Get Marketing Insights First
Subscribe to receive actionable strategies, growth tips, and industry insights delivered straight to your inbox.
Last week I uploaded a travel cut I’d been editing for three days. The visuals were there. The pacing was right. I sat back, hit play — and immediately noticed the music was fighting the whole thing. Too fast, wrong energy, about twenty seconds longer than my clip. The video wasn’t finished. It just had footage with audio on top of it.
Adding music to a video sounds simple. And in a vacuum, it is. But getting it to actually fit — mood, length, timing, volume — that’s the part that eats time. This guide is the workflow I now run every single time, in the order I run it.
Here’s where most people skip a step and pay for it later.
Before you search for a single track, answer this: is the music background or is it featured?
Background music sits underneath. It supports the atmosphere — a product demo, a talking-head video, a brand explainer. The viewer shouldn’t be consciously aware of it. If they are, it’s probably too loud or too interesting.
Featured music drives the video. Think a montage, a travel reel, a short film. The edit often follows the music — cuts happen on beats, the energy of the track shapes the pacing of the whole piece.
This distinction changes everything: what you’re looking for, how loud you mix it, and whether the lyrics matter. A track with vocals and a strong hook will dominate. If your video has a voiceover, that’s usually a problem.
I decide this before I open any music library. Otherwise I waste twenty minutes auditioning tracks that were never going to work.
Once I know the role, I’m looking for one specific thing first: emotional register. Does this music feel like the video?
I’ve started breaking mood into three separate questions when I search:
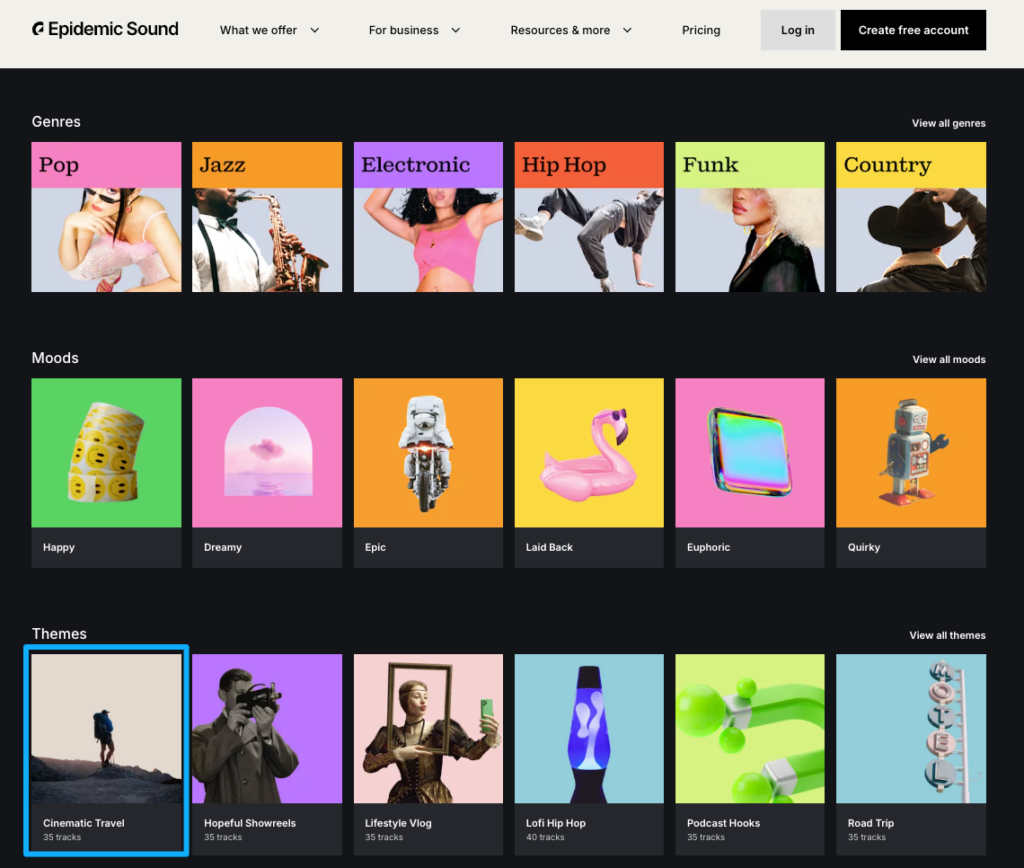
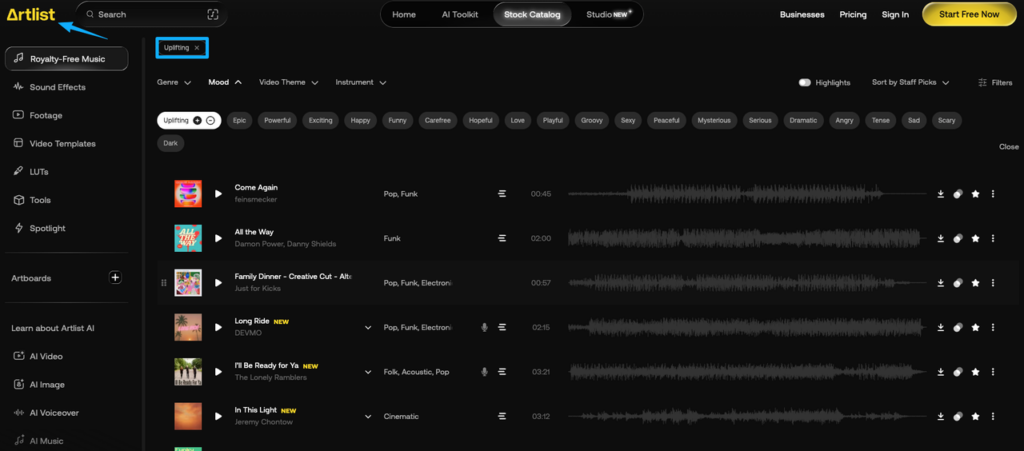
Most music libraries let you filter by these — Epidemic Sound and Artlist both have decent tag-based filters. The problem is that “cinematic” and “uplifting” cover an enormous range, and you still end up doing a lot of listening.
Here’s what actually helped me: I describe the scene out loud before I search. Not “sad music” — something like “like walking back to your car after something went wrong.” That level of specificity cuts my search time in half because I’m not auditioning tracks that technically match a tag but miss the feeling.
One thing I keep coming back to — the first track that gives you a gut reaction is almost always the right one. The problem is we second-guess it and spend another hour looking. Try to notice when that instinct fires and trust it a little more.
This is the step that creates the most friction and wastes the most time. You find the perfect track. It’s 2:47. Your video is 1:34.
You’ve got four options:
Option 2 is my default. I listen through the track specifically for a phrase ending that lands cleanly. Then I mark that point in my timeline and fade out over 2–4 seconds. If there’s no clean exit point, I move to option 3.
What I try hard not to do: cut mid-phrase and fade abruptly. It sounds like the video ran out of budget. Even a half-second crossfade is better than a hard cut on music.
This is the step that turns an edit from “fine” to actually satisfying to watch.
Beat syncing doesn’t mean every cut lands on a beat — that gets exhausting fast. What it means is that emotionally significant moments in the video align with musically significant moments in the track.
Practically:
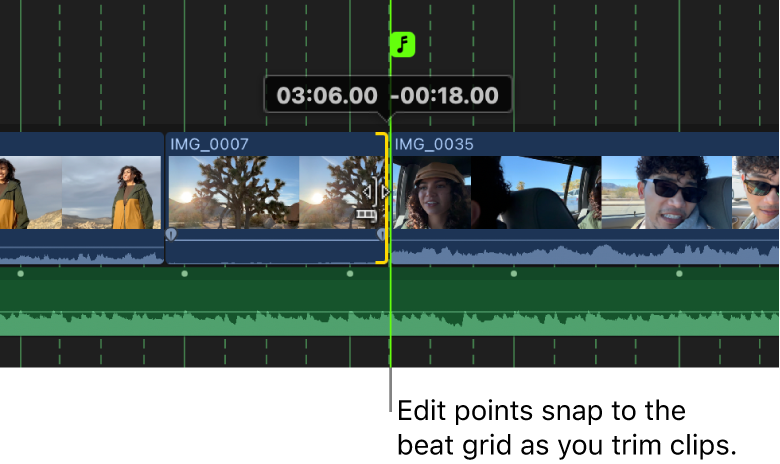
Most NLE software has a way to mark audio beats visually. In Premiere, I use Window > Essential Sound and look at the waveform. In Final Cut, the built-in beat detection under Clip > Enable Beat Detection gets me about 70% of the way there — the rest I mark by ear.
Here’s the thing nobody mentions: you don’t need to sync everything. Syncing 3–4 key moments across a 90-second edit is enough. The viewer’s brain fills in the rest.
Volume is where a lot of otherwise solid videos fall apart. The music is too loud, the voiceover gets buried, and suddenly the viewer can’t hear what’s being said.
The general levels I use:
| Audio Type | Starting Level |
| Background music (under VO) | -20 to -25 dBFS |
| Background music (no VO) | -14 to -18 dBFS |
| Featured music (no dialogue) | -10 to -14 dBFS |
| Voiceover / interview | -12 to -10 dBFS |
These are starting points, not gospel. Your ears make the final call — but if you’re listening on laptop speakers, check on headphones before you export. They tell completely different stories.
One thing that helped me a lot: use automation (or keyframes, depending on your software) to duck the music whenever dialogue starts and bring it back up when dialogue stops. Epidemic Sound’s audio mixing guide for video breaks down exactly how these transitions should be timed — a 0.5-second ease-in and ease-out sounds natural. Without it, the level jumps are jarring.
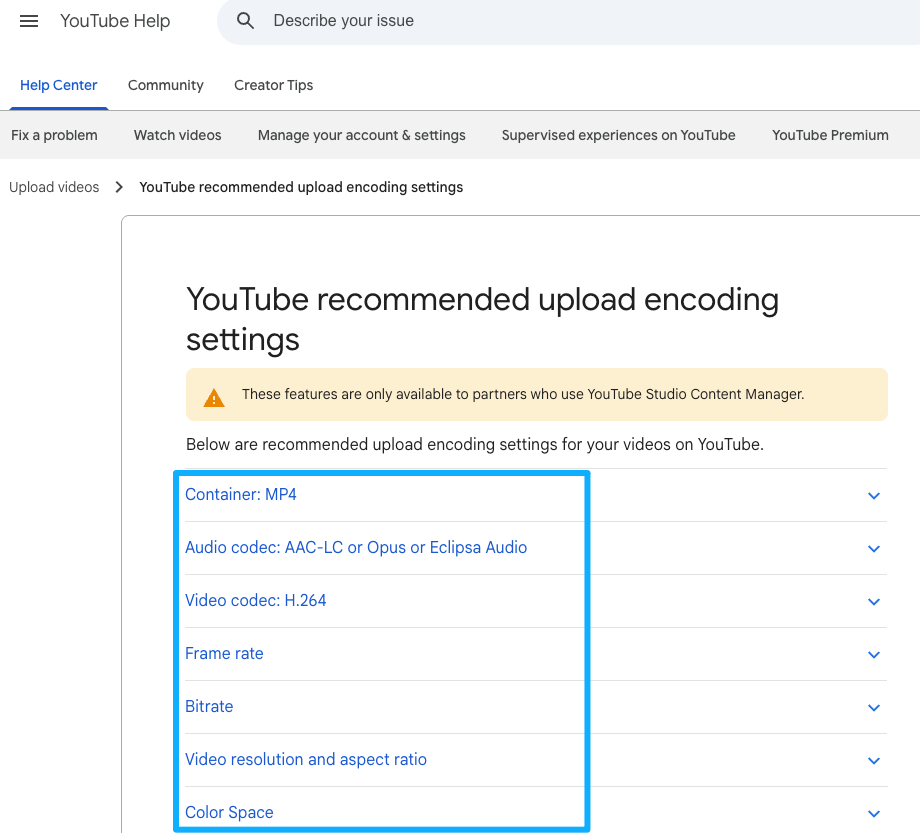
Quick answer: stereo AAC at 320kbps or higher covers the vast majority of video publishing needs. If you’re submitting to a broadcast or film festival, check their spec sheet — those have specific requirements.
For the video container itself: H.264 in an MP4 wrapper is the most universally compatible. It plays everywhere, compresses well, and uploads fast to YouTube, Vimeo, and social platforms.
A few things I check before I export:
YouTube’s recommended upload encoding settings cover the current specs in full, and they update them occasionally — worth bookmarking.
I’m not ranking these. What matters is matching the tool to how you actually work.
If you’re already in Premiere Pro, Final Cut Pro, or DaVinci Resolve, you have more than enough to add and mix music well. These environments give you the most control over timing, keyframing, and multi-track mixing. The learning curve is real, but if you’re doing any serious video work, it pays off.
CapCut and InShot both handle music well for short-form content. CapCut has a surprisingly capable beat-sync feature for Reels and TikTok. The limitation is that fine-grained volume automation is harder on mobile — you’re working with smaller touch targets and fewer precision controls. Good enough for social, limiting for anything longer or more complex.
This is where things have gotten more interesting recently. The core value proposition is different from a library: instead of searching for a track and trimming it to fit, you describe what you need (or, in some cases, upload the video itself) and get music generated to match your specific length and mood.
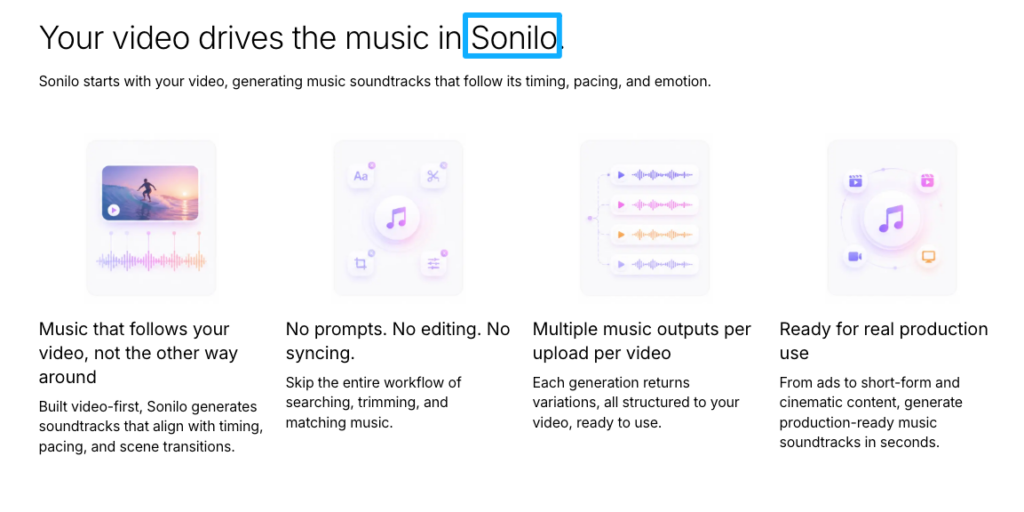
Sonilo sits in this category. The approach is different from a text-prompt generator: you upload the video, and it analyzes motion, pacing, and scene transitions to generate a full-length soundtrack that matches the exact duration — no prompts, no manual syncing. It directly addresses the length-matching problem that burns the most time in Step 3. If that works reliably on your actual footage, it changes the math on whether switching workflows is worth it for certain project types.
Other tools in this space include SOUNDRAW and Mubert — both generate music to a target length, though the control level and output style differ. Worth testing against your own footage to see which output actually fits your aesthetic.
The honest thing to say about AI soundtrack tools: the demo always looks better than the first twenty minutes of actual use. Set realistic expectations for your first session. Run it on a real project, not a test clip, and see how it performs under deadline pressure. That’s when you know if it belongs in your workflow.
A few that come up constantly:
Using a track with lyrics under a voiceover. The brain can’t parse two verbal streams at once. If there’s dialogue or narration, the music needs to be instrumental.
Starting the music at full volume on frame one. Fade it in over 1–2 seconds. It sounds more intentional and less like the audio was just slapped in.
Not checking the ending. The last few seconds of your video are often where music issues show up — an awkward cutoff, a swell that continues past the frame. Spend extra time on the exit.
Assuming “royalty-free” means usable everywhere. This one bites people regularly. “Royalty-free” is a licensing model, not a usage guarantee. What matters is whether the specific license grants you the rights for your actual use case — commercial video, client work, platform publishing. I’m not a lawyer and I’m not the right person to interpret license terms for you, but I’d strongly suggest reading the actual license page of any service before you publish anything commercial.
Q1: Can I legally use songs from Spotify or Apple Music in my videos?
No — and this is worth being clear about. Streaming licenses are personal listening licenses. They do not grant you the right to synchronize music with video content and publish or distribute it. Using a song from Spotify or Apple Music in a YouTube video without a separate sync license means you’re using that music without the rights to do so, regardless of whether you’re paying for a streaming subscription.
If you want to understand how YouTube’s detection system actually works — including how master recordings, composition rights, and public performance rights all interact — YouTube’s official music rights management overview is the clearest place to start before making any decisions.
When you’re looking for music you can actually use, look for sources that explicitly grant video rights — not just “royalty-free” in the marketing copy, but rights for the platform and use type you actually need (personal, commercial, client work, broadcast, etc.). Read the license documentation, not just the homepage claim. I can’t tell you whether any specific service’s license covers your specific situation — that’s a question for whoever manages your legal side, or at minimum, a careful read of the actual terms.
Q2: What’s the easiest step-by-step way for beginners to add music to a video?
Decide if the music is background or featured → find a track that matches the mood → trim or fade it to your video’s length → check the volume sits right relative to any dialogue → export. That’s the whole thing. The steps in this guide walk through each one.
Q3: How do I match music length to my video without cutting the song awkwardly?
Listen for a natural ending point in the track — end of a verse, a breakdown, a moment of musical resolution — then fade out over 2–4 seconds from there. If the track has no clean exit point, loop a low-complexity section. AI soundtrack tools that generate to your exact length sidestep the problem entirely.
Q4: Should the music be background or featured, and how do I decide?
If the video has dialogue, narration, or sound design that the viewer needs to hear, the music is background. If the music drives the edit and the video is primarily visual, it can be featured. When in doubt, background — it’s easier to mix and less likely to clash.
Q5: What volume level should the music sit at so it doesn’t overpower voice or important audio?
Background music under voiceover: aim for -20 to -25 dBFS. Featured music with no dialogue: -10 to -14 dBFS. Use keyframes to duck the music automatically when someone speaks. Check on headphones before you export — laptop speakers lie.
Q6: Do I need professional editing software or can I do it on mobile?
For social content under 60 seconds, mobile editors like CapCut handle it fine. For anything longer, more complex, or going to a client, a desktop NLE gives you significantly more control — especially around volume automation and multi-track mixing.
Q7: How do I sync music beats to key moments in the video?
Use the waveform display in your editing software to visually identify beat peaks. Mark 3–4 emotionally significant moments in your video, then shift the music position until those moments align with corresponding beats or transitions in the track. You don’t need perfect beat-sync throughout — a few well-placed hits are enough.
Q8: What file format and quality should I export with after adding music?
H.264 video in an MP4 container, AAC audio at 320kbps or higher, 48kHz sample rate. For YouTube specifically, check their current audio and video encoding specifications — they update the guidance periodically and the loudness normalization target (-14 LUFS integrated for music content) is worth knowing.
If you’re going through this workflow for the first time on a real project, don’t try to do all six steps in one session. Steps 1–3 (deciding the role, finding the track, matching the length) are the decisions that matter most and where most of the time goes. Get those right first. Steps 4–6 are refinements.
The music situation in video editing is genuinely annoying — not because it’s technically hard, but because “almost right” and “actually right” feel so different in the final product, and the gap between them takes time to close. The workflow above is how I close that gap without spending the whole afternoon on it.
If you’re curious whether an AI soundtrack tool could skip steps 2–3 entirely for certain project types, Sonilo is worth testing against a real project — upload a video at sonilo.com and see whether the result actually fits before you commit to the workflow.
What’s the step in this process that actually slows you down most? Finding the right mood, wrestling with the length, or something else? Drop it in the comments — I’m genuinely curious how different creators are hitting the same wall in different places.
Recommended Reads