Guides
How to Add Audio to a Video and Keep Original Sound
- Written by
- Sonilo Team
- Published
There's a version of this problem I've seen play out dozens of times.
The video is good. The pacing works. The footage says what it needs to say. Then someone adds a music track, and suddenly the whole thing feels like a mess — the voiceover is fighting the music, the product sound is buried, and nothing is sitting where it should. The edit didn't break because of bad footage. It broke because of audio layering that nobody thought through.
This guide is about that exact thing: how to add sound to a video without losing what was already there. Not which button to click in which app — but how to think about multiple audio layers coexisting in the same timeline, so the final playback actually makes sense.
Why Adding Audio Is Different From Replacing Sound
Most tutorials frame this as a technical step. Find the audio track panel. Drag in the file. Done.
That's not what adding audio actually involves.
When you add new audio to a video — music, a voiceover, a sound effect — you're not inserting something into empty space. You're placing it alongside audio that's already there. The original footage has a sound layer. That layer might include ambient room noise, someone speaking, a product being used, a crowd in the background. And now your new audio has to share that space.
Here's the thing nobody mentions: the original sound is often the most important audio in the video. Muting it or burying it under music isn't an edit. It's a mistake.
Music, Voiceover, Sound Effects, and Original Audio
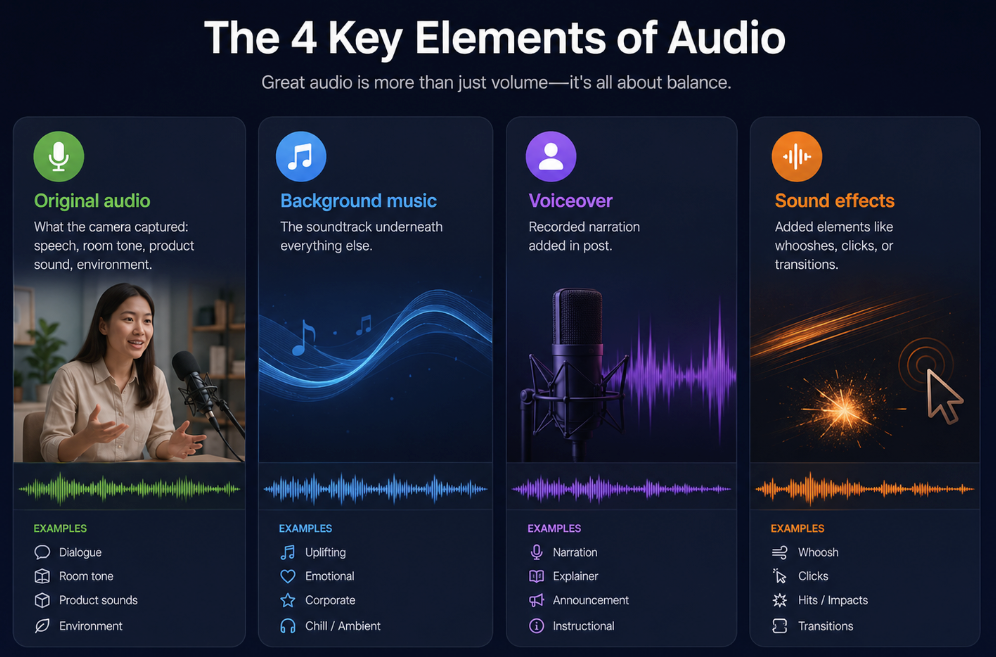
These are the four audio layers most editors work with:
- Original audio — what the camera captured: speech, room tone, product sound, environment
- Background music — the soundtrack underneath everything else
- Voiceover — recorded narration added in post
- Sound effects — added elements like whooshes, clicks, or transitions
Each one has a job. They don't all run at the same volume. They don't all compete for the same frequency range. But they do all end up on the same timeline, and they all reach the same pair of ears.
When the Original Sound Should Stay in the Video
Not every piece of original audio is worth keeping. But some of it is essential.
If someone is speaking on camera, their voice is the anchor. If a product demo shows a satisfying click or pour or unboxing moment, that sound is part of the point. If the footage has ambient noise that creates a sense of place — a café, a street, a studio — pulling that entirely can make the video feel sterile.
The question isn't "should I keep the original sound?" The question is "which parts of the original sound are doing real work?"
Step 1: Decide What Each Audio Layer Should Do
Before you add anything, figure out what role each sound layer is supposed to play in the video. This sounds obvious. It's consistently skipped.
Background Music, Voice, Product Sound, and Effects
Run through your video without any added audio first. Note where the original sound is load-bearing — dialogue, product moments, environmental cues — and where it's just room noise that can fade or disappear.
Then ask: what is the music supposed to do here? Is it filling silence? Creating emotional texture? Setting a pace that the visuals need to match? The answer changes how loud it should sit and where it should breathe.
For voiceover, the rule is simpler: it almost always takes priority. If someone is speaking, everything else drops.
Sound effects tend to be the most forgotten layer. They work best when they're timed to a visual moment — a cut, a product reveal, a transition. When they're not timed to anything, they just add clutter.
Avoid Competing Sounds in the Same Moment
Here's where most add-audio projects fall apart: two sounds hitting the same emotional register at the same time.
Music swelling while someone is making a key point on camera. A sound effect landing right when the voiceover is delivering its main line. Original room noise competing with a music track in the exact same frequency band.
The fix isn't complicated. It's just: don't let two sounds fight for the same moment. One leads. The others step back.
Step 2: Add the New Audio Track to the Edit
This is the mechanical part, but it matters how you do it — not just that you do it.
Place Audio Under the Right Scene or Sequence
When you add a new track — music especially — resist the reflex to start it at the beginning of the video and let it run all the way through. Ask where the music actually starts making sense. Sometimes that's the first frame. Sometimes it's after the opening line of dialogue lands.
Same with sound effects. They belong under the specific cut or moment they're supporting, not floating somewhere near it.
I've seen edits where the music comes in two seconds too early and it shifts the entire emotional read of the opening. Two seconds. The music itself was fine. The placement wasn't.
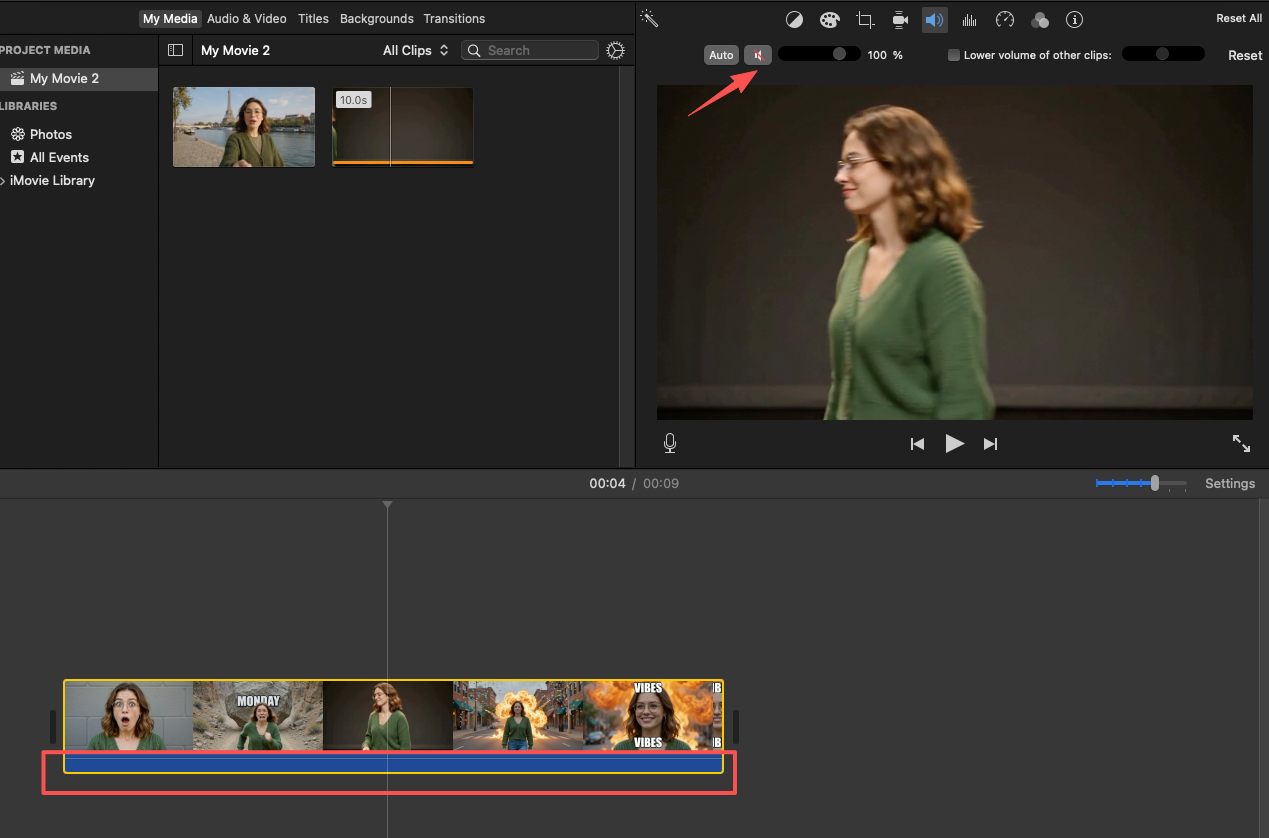
Keep the Original Sound Where It Matters
If you're working in any standard editing software — Premiere, Final Cut, CapCut, DaVinci — the original audio on your footage lives on its own track. Don't delete it. Reduce it where the new audio is carrying the moment, but keep it present where it needs to be.
For product videos specifically: the audio of someone actually using the product is often more convincing than any music or narration. A coffee being poured, a keyboard being typed, a bag being zipped — those sounds do real work. Don't cover them up.
When you want to combine video with audio from an external source — say, a separate voiceover file recorded outside the camera — treat it as its own distinct track, not a replacement for what the camera already captured. Layer it. Then decide what each layer's volume should be.
Step 3: Balance Volume Between Layers
This is the step most people rush. It's also where edits go wrong in ways that are surprisingly hard to hear until you're on someone else's speakers.
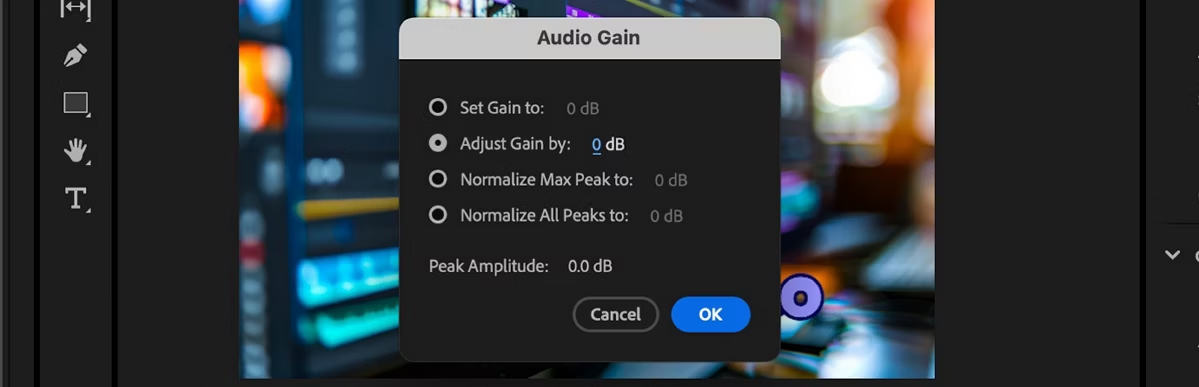
Keep Speech and Key Sounds Clear
Speech — on-camera or voiceover — typically sits around -12 to -6 dBFS. Music underneath it usually sits 10 to 20 dB lower than that, depending on how dense the track is and how critical the speech is. Sound effects are usually somewhere between the two, timed to be felt more than consciously noticed.
Those aren't universal rules. They're starting points. The actual test is whether you can understand every word clearly without the music distracting from it.
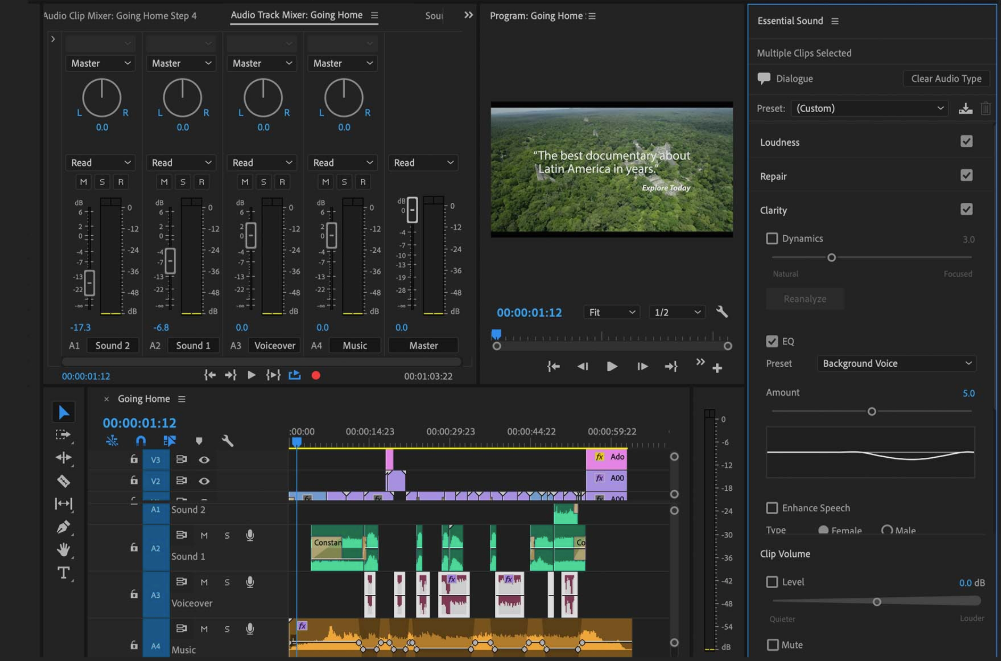
Adobe's official guide to adjusting volume levels in Premiere Pro covers how to use keyframes and the Audio Meters panel to monitor dialogue levels across tracks — worth bookmarking if you're doing this kind of multi-layer work regularly.
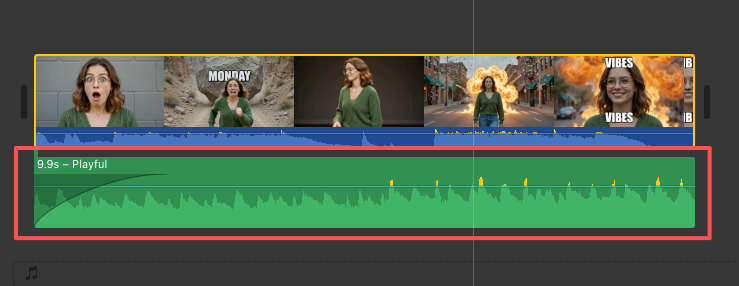
Lower Music When the Video Needs Clarity
This is called ducking, and it's one of the most useful habits in audio layering. When someone starts speaking, when a product sound needs to land, when the voiceover delivers the main point — the music volume drops. When that moment passes, it comes back.
You can do this manually with keyframes, or use the built-in tagging system in Adobe's Essential Sound panel audio mixing guide — label each track as Dialogue, Music, or Effects, and Premiere handles the relative volume relationships automatically.
The point isn't to make the music disappear. It's to make it move out of the way.
Step 4: Match the Audio to the Video Pace
Here's where audio goes from functional to good.
Align Changes With Cuts, Motion, and Transitions
If the music has a beat, that beat should ideally land on your cuts. Not every single cut — that gets exhausting fast — but the major ones. An edit where the music and the video are moving at completely different rhythms will feel off to viewers who can't explain why it feels off.
When you're working to add sound effects to video, this is especially true. A whoosh that lands half a second after the transition it's supposed to support sounds like a mistake. A click effect that hits exactly on a product reveal sounds like craft.
I spent probably two hours on a short product video once just nudging a three-second music sting to land correctly on a cut. The before and after were genuinely different experiences. That's a frustrating use of two hours — but it's also just how audio-to-video pacing works.
Use Fades to Make Audio Changes Feel Natural
Abrupt audio changes are almost always jarring. Music that cuts hard when a scene ends. Voiceover that stops cold. Effects that appear without warning.
Fades don't have to be long. A half-second fade in or out on a music transition is often invisible to the viewer — they just don't notice a problem. Without it, they will.
Which is exactly the part that matters — the smoothness of an audio transition is often what separates a polished edit from something that feels thrown together.
Step 5: Review the Full Video Before Publishing
Don't trust your editing speakers alone.
Check Headphones, Speakers, and Mobile Playback
Most viewers aren't using studio monitors. They're using phone speakers, cheap earbuds, laptop speakers, or Bluetooth devices with wildly different frequency responses. What sounds balanced on your monitors might have the music completely swallowing the dialogue on a phone speaker.
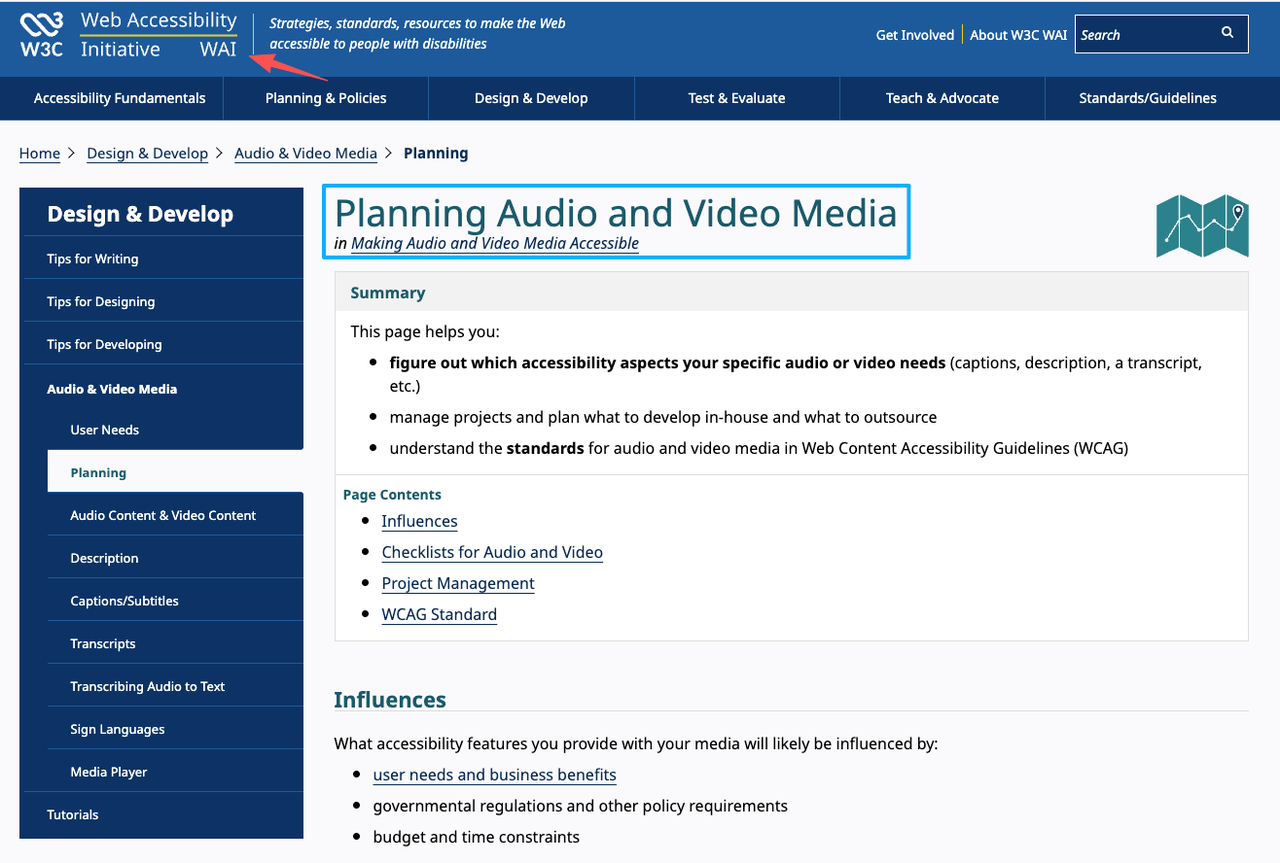
The W3C's audio and video accessibility planning guide is worth a look here — not for technical compliance, but for the underlying principle it makes clear: audio that works across different playback contexts isn't a bonus feature, it's the baseline expectation for content meant to reach a broad audience.
My own process: final check always includes phone playback, no headphones. If I can hear every word and the music still feels present, the levels are probably right.
Fix Moments Where Music or Effects Distract
Play the video and just notice where your attention goes. If you find yourself hearing the music instead of following the content — that's a flag. If a sound effect pulls you out of the moment instead of reinforcing it — that's a flag.
You're looking for moments where the audio is working against the video instead of with it. Fix those specifically. Don't re-mix the whole thing.
Common Mistakes When Adding Audio to Video
Muting Useful Original Sound by Accident
This happens more than you'd think. Someone deletes or mutes the original audio track entirely because they plan to add music — and then loses the dialogue, the product sound, or the ambient cue that made the footage worth using in the first place.
Always work with the original audio on a separate track. Mute it in sections if needed. Don't delete it until the edit is locked.
Adding Too Many Audio Layers
Four layers is generally the ceiling for most short-form video: original audio, music, voiceover, effects. More than that and you're managing complexity for its own sake.
The question isn't "what can I add?" It's "what does this video actually need?"
Letting Effects Compete With the Soundtrack
Sound effects are supposed to punctuate moments, not run alongside the music as a second continuous soundtrack. If your effects are playing constantly throughout the video, most of them probably shouldn't be there.
When an effect lands on exactly the right frame, it disappears. The viewer just feels it. When it doesn't, they hear it — and not in a good way.
Tools That Help With the Layering Problem
Getting the layering right is mostly a decision problem, not a tool problem. But some tools make the decisions easier.
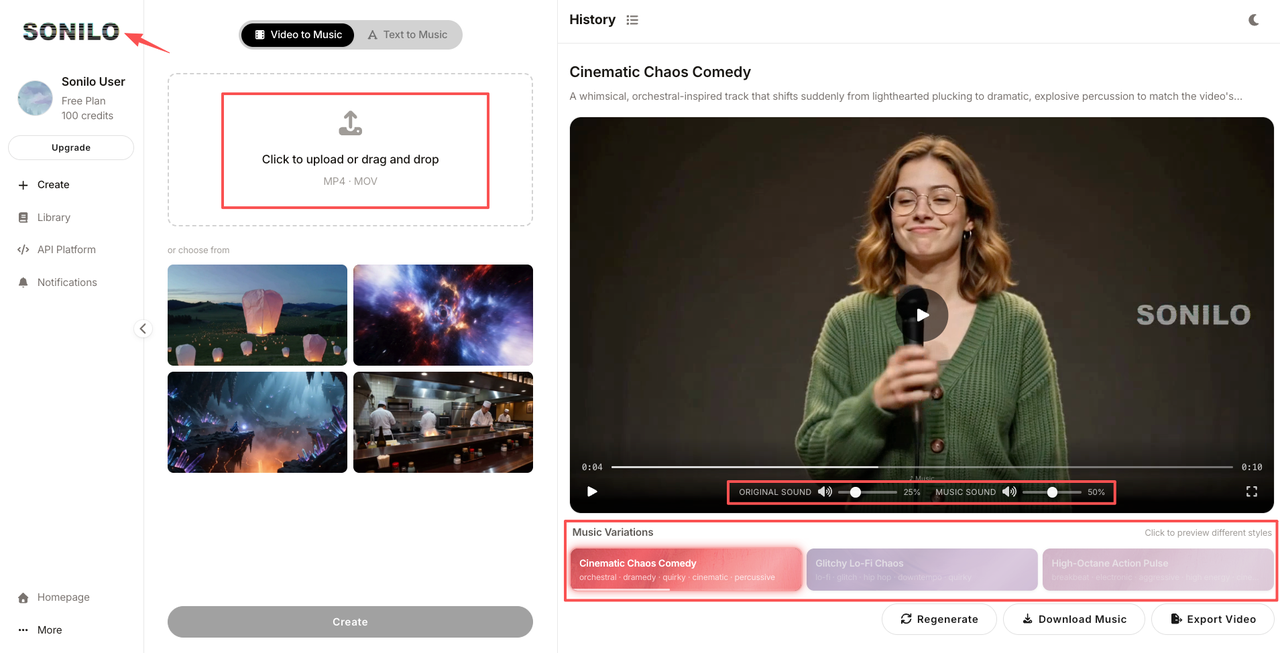
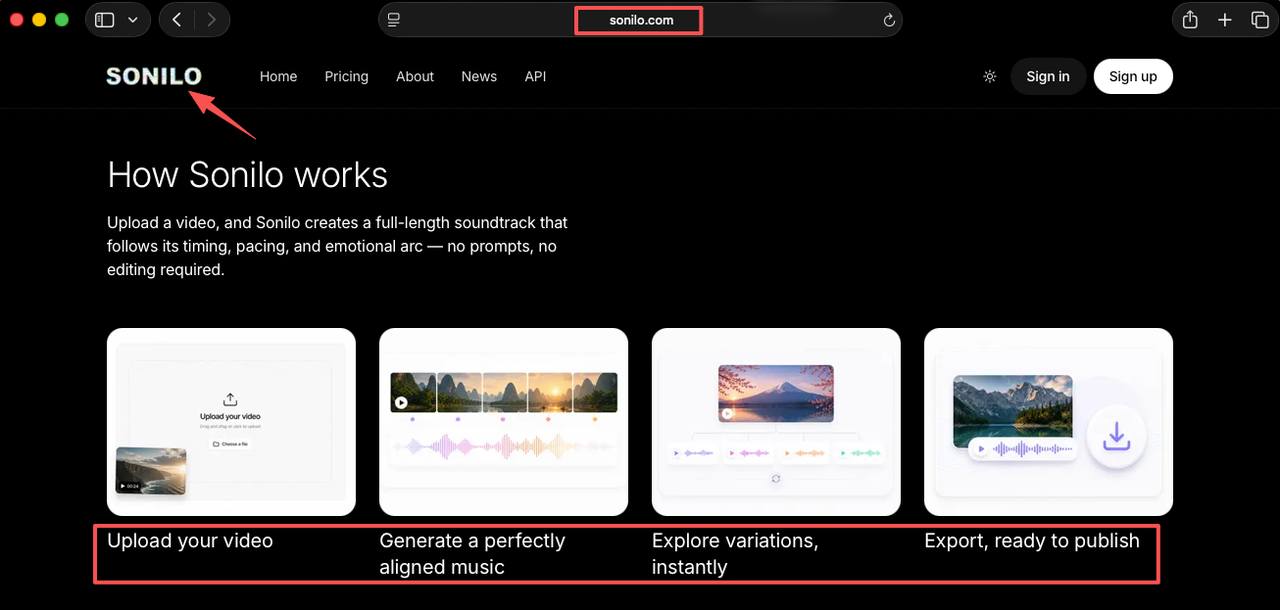
For the background music layer specifically — which is often the hardest to get right because it has to fit the video's pace, mood, and duration — Sonilo approaches this from the video side rather than the music side. You upload a video, and it generates a full-length soundtrack matched to the timing, pacing, and emotion of your cut — no prompts, no manual editing. Whether the result actually fits depends on your footage, but it's free to start, so the easiest way to know is to run your own video through it. The license page is worth reading before you use it for anything client-facing; I can't interpret it for you.
For everything else — volume control, fade editing, track management — the editing software you're already using will handle it. The workflow decisions matter more than the tools.
FAQ
What is the difference between adding audio and replacing original sound?
Adding audio means placing a new track alongside what's already in the footage — not deleting or muting the original. Replacing original sound means removing what the camera captured and substituting something else. Most of the time, adding is the right move. Replacing is appropriate only when the original audio is genuinely unusable.
How do I add audio to a video while keeping the original sound?
Keep the original footage audio on its own track in your editing software. Don't delete it. Add your new audio — music, voiceover, effects — on separate tracks above or below it. Adjust volumes so each layer serves its purpose without competing. The original sound stays present wherever it's doing real work.
How do I balance multiple audio layers in a video?
Start with speech at a clear, legible level. Music goes lower — usually significantly lower when anyone is talking. Effects are timed to specific moments rather than running continuously. Then do a full playback on headphones and phone speakers separately, and adjust anything that feels wrong on either. The goal is clarity, not perfection.
What should I check when placing new audio behind voice or product sounds?
Check that the music isn't masking the consonants in speech — those high-frequency sounds ("s," "t," "f") are the first to get buried. Check that product sounds you want the viewer to notice aren't sitting in the same frequency range as your music. And check that the music drops — even slightly — when the most important audio moment in a scene is happening.
When should creators use separate tracks for music, voiceover, and sound effects?
Always. Every audio layer should live on its own track in your timeline. This makes volume control, fades, and timing adjustments possible without touching everything else. If you merge layers before the edit is locked, you lose the ability to fix individual elements later. Keep them separate until export. YouTube's own guidance on using music from the Audio Library reinforces this: knowing exactly which audio layer is which matters especially when you need to swap or remove a track before publishing.
One More Thing Before You Export
The most common question I hear from creators who've just finished an edit isn't "does it look good?" It's "does it sound right?" Those are actually the same question — a video that sounds wrong doesn't look good either.
The layering decisions you make — what stays, what drops, what leads at which moment — are what determine whether viewers feel like they're watching something coherent or something assembled. The technical steps are just how you execute those decisions.
If background music is the piece that's hardest to get right in your current workflow, I'd look at whether you're spending more time fitting music to the video than actually editing the video. That's where tools built around the video-first approach can change the equation — not by making the music decisions for you, but by giving you something that starts closer to fitting rather than something you have to force into shape.
If you want to see how that plays out in practice, Sonilo is free to start — upload a video and you'll have a matched soundtrack in seconds. Worth a test run before your next edit.
What about you — when you add audio to a video, which layer gives you the most trouble? Is it the music fitting the pace, the voiceover sitting cleanly over the original sound, or something else entirely?