Guides
How to Add Music to Premiere Pro: A Clean Audio Workflow
- Written by
- Sonilo Team
- Published
Adding music to Premiere Pro is not just a drag-and-drop task. For a clean edit, the soundtrack needs to be organized, placed on the right track, trimmed around the picture edit, and checked against dialogue or important production sound before export. When the cue is a single confirmation ding rather than a music bed, follow the clear ding feedback sound effect guide.
This workflow keeps the process simple: prepare the music file, import it into the project, place it on a dedicated audio track, shape it around the sequence, then review the final mix without relying on one universal volume number.
Organize music files before importing
Before you import music into Premiere Pro, put the file somewhere stable. Do not leave the only copy in Downloads, a temporary folder, a message attachment, or an external drive that may be disconnected later.
A clean project folder might include separate folders for video, audio, graphics, exports, and project files. Adobe’s guide to importing media directly recommends pre-organizing media in clearly named folders before editing, because Premiere creates linked clips that point back to the original files on your computer.
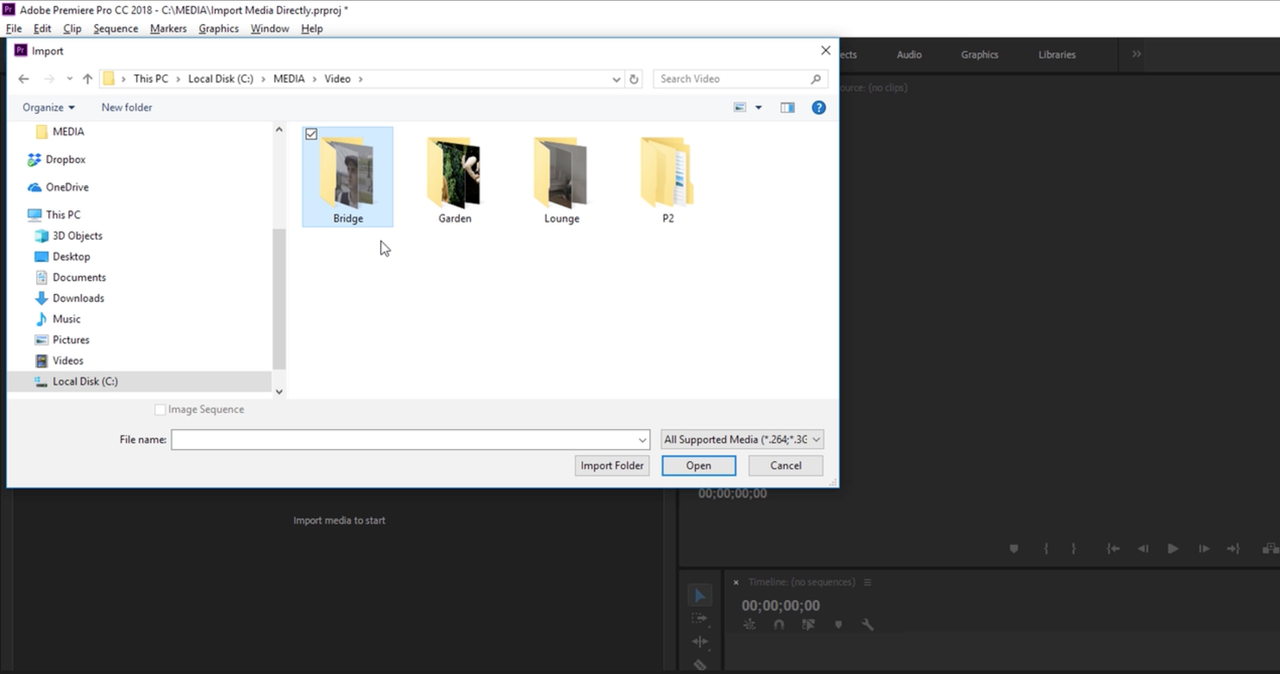
For music, keep the file name readable. Instead of track-final-new2.mp3, use something like brand-launch-60s-licensed.wav or interview-bed-v03.mp3. If the music is licensed, keep the license receipt, source URL, cue sheet, or approval record near the project.
If you are working from removable media, copy the file to your project drive first. Adobe’s documentation on transferring file-based media recommends moving media to a local hard disk for better performance, and copying folder structures when needed to preserve the original organization.
Import music into a Premiere Pro project
To add music to Premiere Pro, open your project and import the audio file. The most direct options are File > Import, dragging the file into the Project panel, or dragging it directly from Finder or File Explorer into the Timeline panel.
Adobe’s import guide explains that dragging media into the Project panel creates linked clips in your project, while dragging media into an open Timeline adds it to the sequence and imports it into the Project panel at the same time.
For audio quality, start with the best source file available. Adobe’s page on importing digital audio notes that compressed formats such as MP3 permanently remove some audio data to reduce file size, while uncompressed or CD-quality audio gives Premiere more information to work with.
That does not mean every social video needs a WAV file. It means the source should match the importance of the project. For a quick draft, MP3 may be fine. For a client delivery, campaign video, or edit that will move through multiple versions, a high-quality WAV or AIFF is usually easier to trust.
Premiere also creates cache-related files for imported audio. Adobe’s media cache documentation explains that Premiere stores peak files for waveform display and conformed audio files for performance. These files help Premiere work smoothly, but they do not replace the original music file. Keep the source audio.
Place music on the correct timeline track
Once the music is imported, place it on a dedicated audio track in the Timeline panel. This keeps the soundtrack separate from dialogue, camera audio, sound effects, and voiceover.
A common structure is:
A1: production sound or dialogue
A2: voiceover or alternate dialogue
A3: sound effects
A4: music
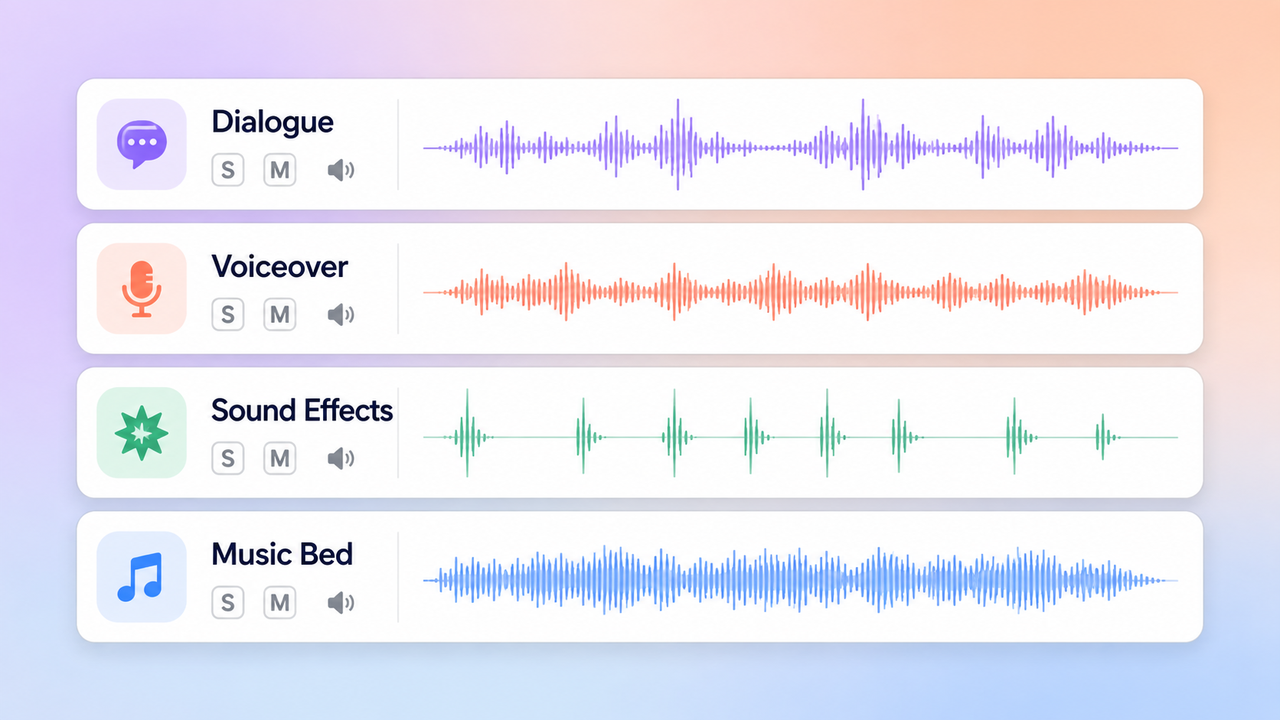
Your exact layout may differ, but the principle is the same: keep music separate enough that you can mute, lock, trim, or adjust it without disturbing other audio.
If you need another audio track, Adobe’s guide to adding tracks in Premiere says new audio tracks appear below existing audio tracks, and that audio tracks must match the channel type of the clips they receive, such as mono, stereo, or 5.1.
When placing clips precisely, use source patching and track targeting carefully. Adobe describes Source Patching as a way to specify exactly where an asset should appear in the timeline, which is especially useful when working with multiple video or audio tracks. Track Targeting controls which tracks are affected by editing actions, according to Adobe’s guide to working with track targeting.
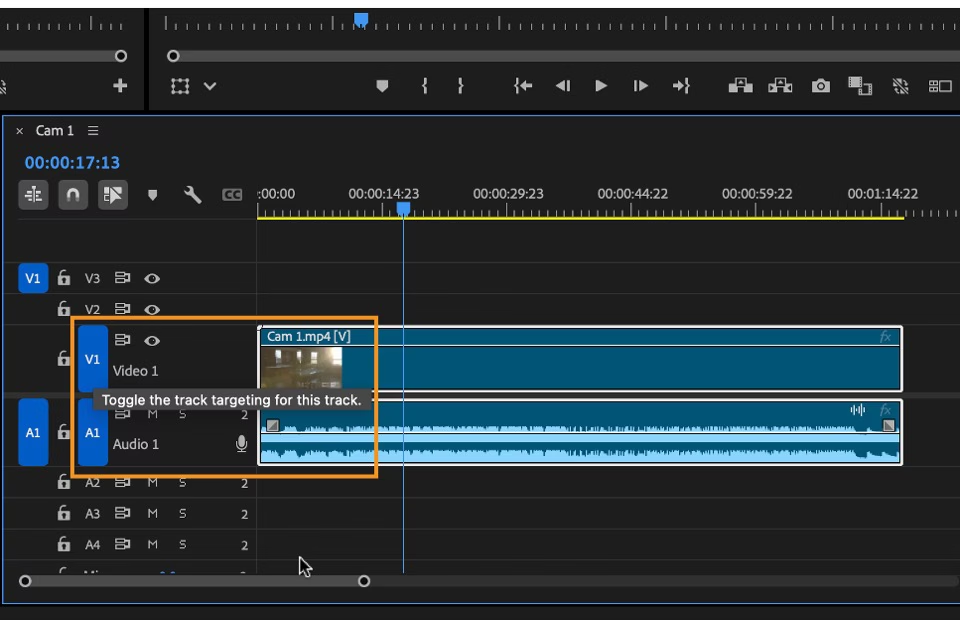
For soundtrack work, this matters. If your music lands on the wrong track, it can become mixed with voiceover, production audio, or effects. That makes later changes slower and increases the chance of accidental edits.
Fit music to the sequence without awkward cuts
After the music is on the timeline, shape it around the edit. Do not assume the beginning of the music file should always match the first frame of the video.
A clean soundtrack usually follows the picture. The opening should support the viewer’s first impression, and the ending should land with the final visual moment.
Adjust the opening position
Play the first 10 to 15 seconds of the sequence with the music enabled. Ask whether the first beat, texture, or phrase arrives at the right moment.
If the video opens with dialogue, the music may need to start lower, later, or under a quieter section of the track. If the opening is visual, the music can start more confidently. If the track has a long intro, move the music clip so the useful section begins where the edit needs energy.
You can also cut into the track later than its original start. This is often cleaner than forcing a slow intro to fit a fast opening. Just make sure the new start does not feel abrupt. For detailed ending control, use the Premiere music fade-out guide for transition and keyframe steps.
Trim around picture lock
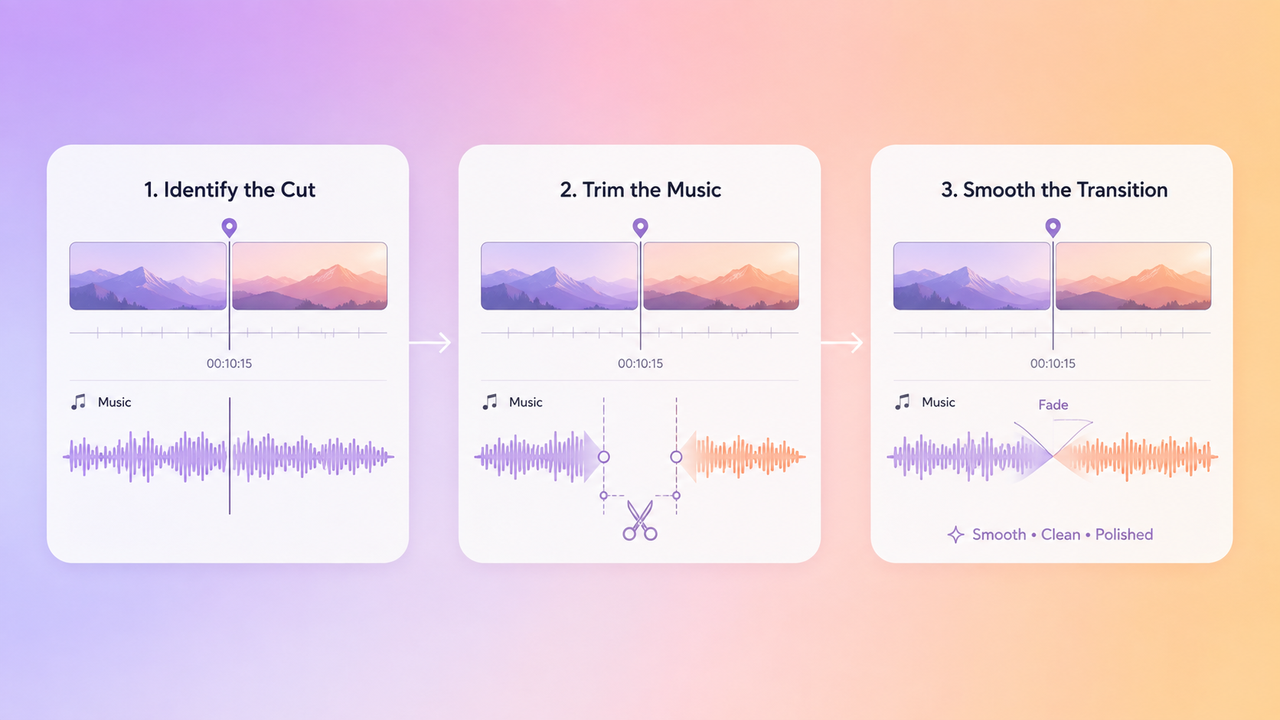
Music trimming is easier after the sequence is close to picture lock. If major visual edits are still changing, the music will keep slipping out of alignment.
Once the sequence length is stable, trim the music around the final structure. Look for natural edit points: downbeats, pauses, phrase endings, or moments where the arrangement thins out. Avoid cutting through vocals, cymbal crashes, or dramatic transitions unless the cut is hidden under a visual change.
If one music file is too short, you can duplicate a section, use a second cue, or prepare a custom-length version before bringing it back into Premiere. If it is too long, trim the ending around a natural beat and use a simple ending treatment. The goal is not to show off the audio edit. The goal is for the viewer not to notice the edit at all.
Keep dialogue and key production sound clear
Music should not cover the reason the video exists. If the sequence includes interviews, narration, tutorials, testimonials, product demonstrations, or meaningful natural sound, the soundtrack needs to sit behind those elements.
Avoid fixed volume advice such as “set music to this exact number.” A quiet piano cue under a voiceover and a dense electronic track under an action montage will need different treatment. The right level depends on the voice, the music arrangement, the delivery platform, and the audience’s listening environment.
Premiere gives editors several ways to manage this. In the Essential Sound panel, you can tag clips by type, such as Dialogue or Music. Adobe’s guide to automatic audio ducking explains that ducking can lower clips tagged as Music or Ambience when dialogue or voiceover is detected. Premiere adds keyframes to an Amplify effect, and editors can adjust or remove those keyframes later.
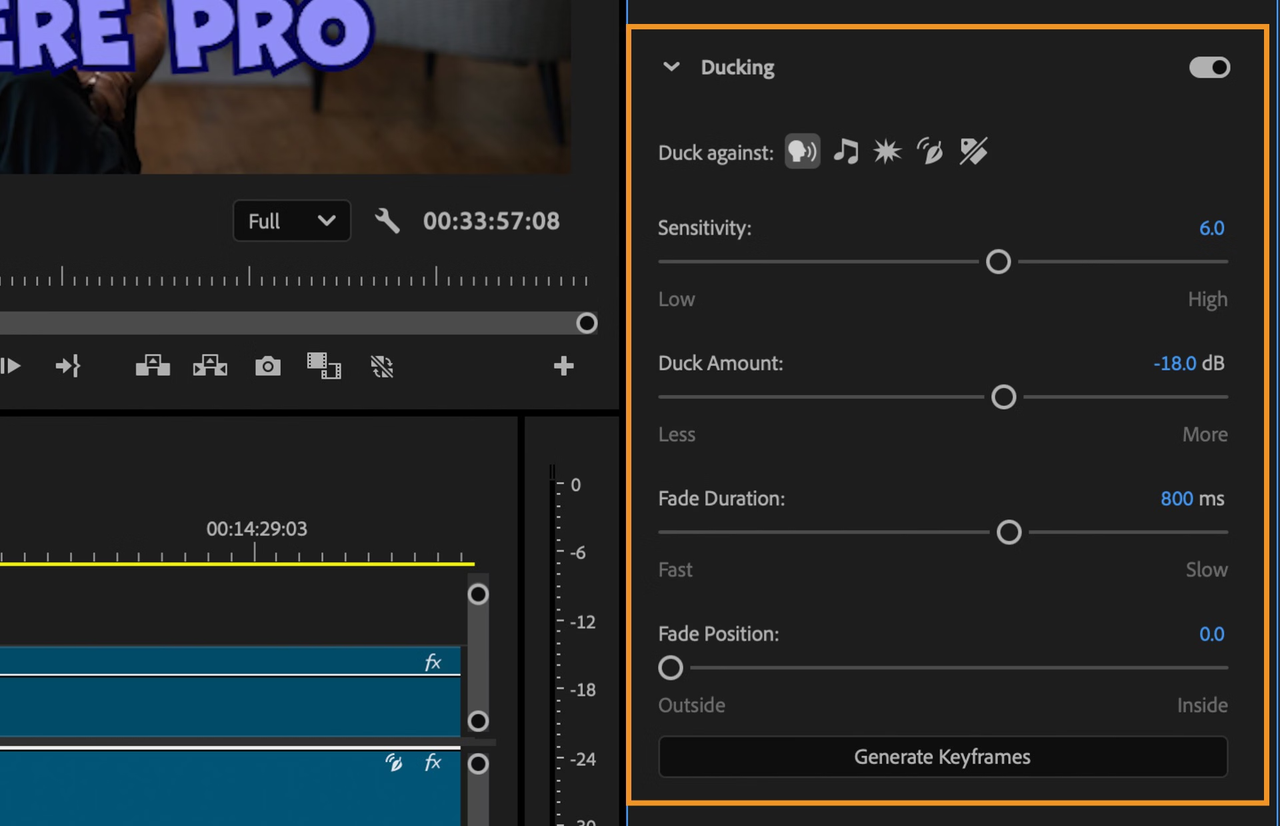
This is useful, but it is not a substitute for listening. Auto Ducking can get you close, especially in dialogue-heavy edits, but review each important section manually. Watch for moments where the music rises too soon after a sentence, dips during a pause that should feel emotional, or hides a small production sound that the viewer needs.
For important edits, check the mix in more than one listening environment: headphones, laptop speakers, and the kind of device your audience is likely to use. If the voice feels clear in all three, the balance is probably in a better place.
Review the mix before export
Before exporting, watch the full sequence without stopping. Do not only check the music edit in isolated sections. A track that sounds good in the first 20 seconds can become tiring after two minutes, especially if it repeats under dialogue.
During review, listen for:
- Dialogue or voiceover staying clear.
- Music entries and exits feeling intentional.
- Production sound remaining audible where it matters.
- No obvious clipping, distortion, or distracting level jumps.
- The final music moment landing naturally with the final frame.
If the project uses Adobe Stock preview audio, confirm it is licensed before publishing. Adobe’s guide to using Adobe Stock audio in Premiere says preview tracks can be dragged into a sequence for testing, then licensed later, and Premiere replaces preview versions with high-quality licensed versions after purchase.
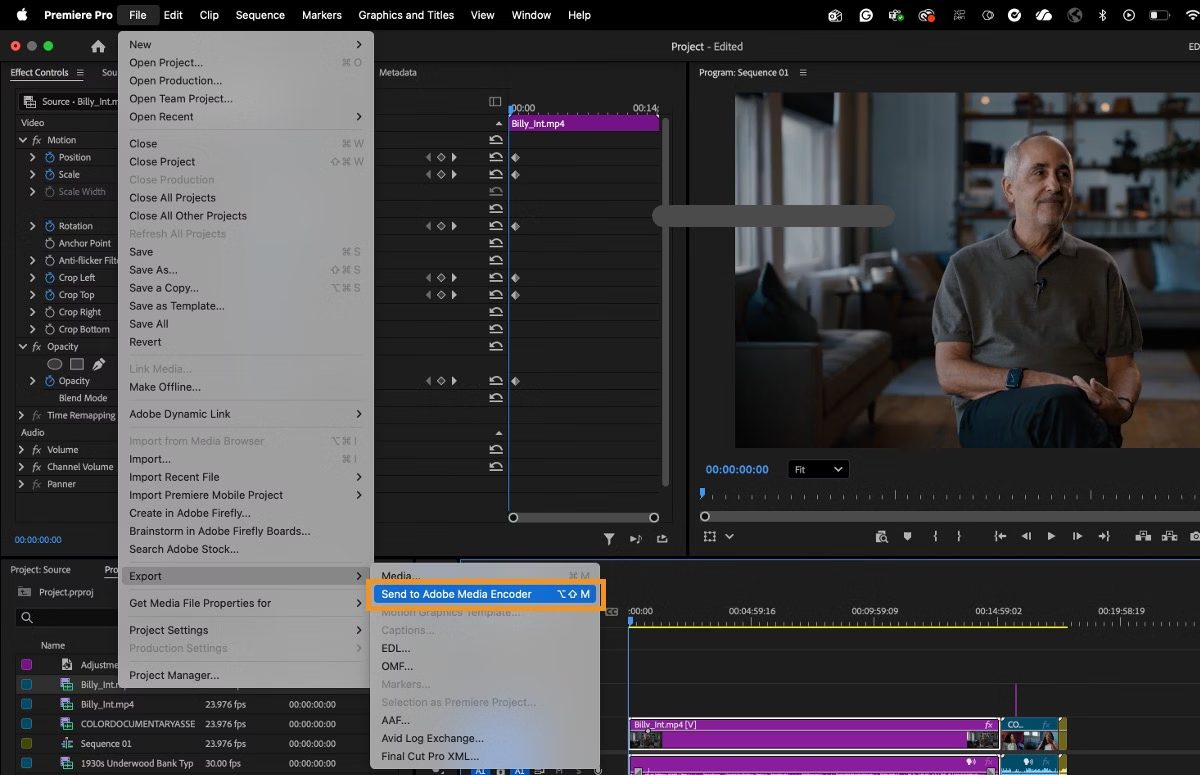
When the sequence is ready, export the video. Adobe’s export video guide says to select the sequence in the Timeline panel, choose File > Export > Media, then set the file name, location, format, preset, and other output settings. Adobe also notes that H.264 is recommended for most online videos.
For longer exports or multiple delivery versions, Adobe’s guide to exporting to Adobe Media Encoder says you can send a sequence to Media Encoder and continue working while it renders.
After export, watch the exported file. The final file is what the client, audience, or platform will hear.
When a custom-length soundtrack is more efficient
Sometimes it is faster to prepare the music outside Premiere instead of forcing a track to fit inside the edit.
A custom-length soundtrack can help when the sequence has a fixed duration, a strict brand format, a voiceover with planned pauses, or a social cutdown that needs to land cleanly at 15, 30, or 60 seconds. Instead of hiding edits across the music bed, you bring in a track that already fits the structure.
This is where a tool like Sonilo may fit into a Premiere Pro workflow, depending on the available features and export options. The practical boundary is simple: prepare or source the soundtrack outside Premiere, then use Premiere Pro to import the audio, align it to picture, preserve dialogue, and approve the final mix.
Keep the rights boundary clear as well. A custom soundtrack is still a music source, so the editor or publishing team should confirm the license, permission, or ownership before the video goes live.
FAQ
How should editors relink missing music files?
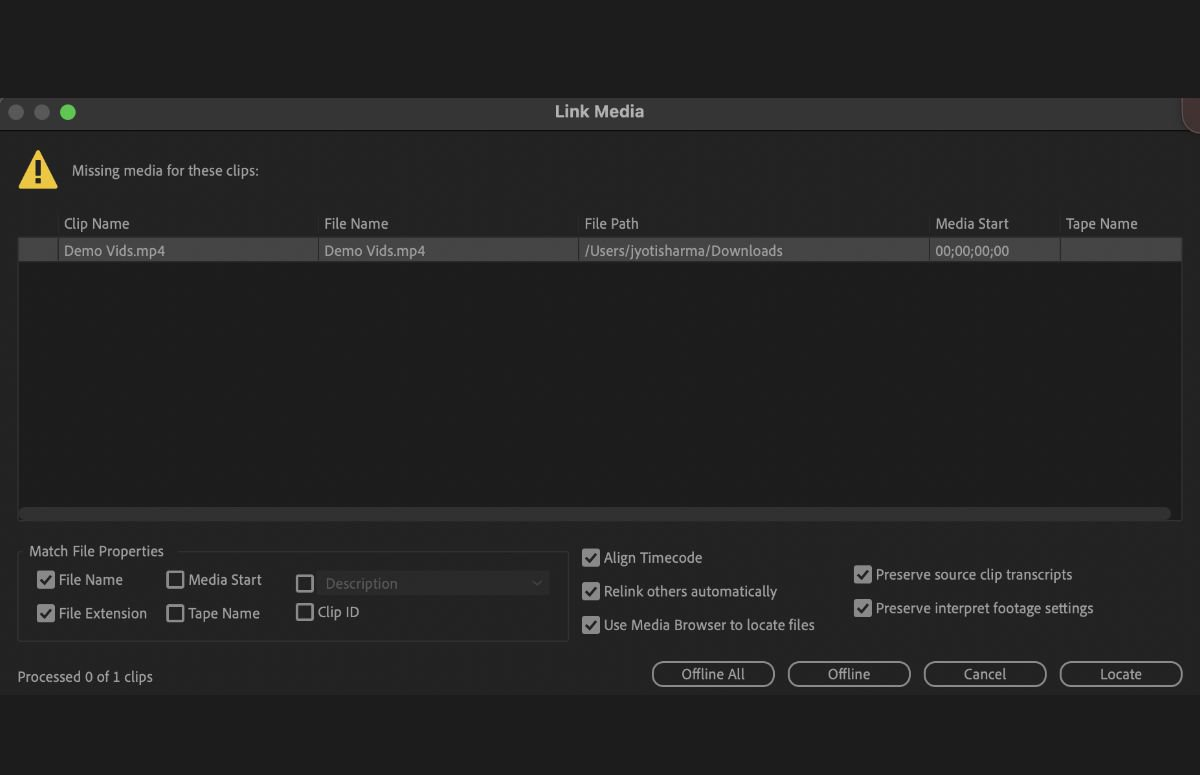
Use Premiere’s Link Media workflow. Adobe’s guide to locating and linking offline files says the Link Media dialog shows broken links, clip names, linked filenames, and the folder path where the offline media was stored. Select the offline music clip, choose File > Link Media, then locate the correct source file.
What audio information belongs in a project handoff?
Include the music file, source or license information, version name, approval status, and any notes about where the track is used. If the project needs to move to another editor or system, Adobe’s Project Manager workflow can collect files and copy them to a new location, according to its guide on transferring file-based media.
Can one music file be reused across sequence versions?
Yes, as long as the usage rights allow it and the source file remains linked. Reusing the same file across sequence versions can make revisions cleaner, but label each sequence clearly so editors know which timing, mix, and approval state belongs to each version.
Who approves the soundtrack after picture lock?
The editor can recommend the mix, but the project owner, client, producer, or publishing team should approve the soundtrack after picture lock. Approval should cover timing, clarity, mood, usage rights, and whether the final exported file sounds correct.