Guides
Premiere Music Fade-Out: Fix Abrupt Video Endings
- Written by
- Sonilo Team
- Published
A Premiere music fade out should make the ending feel intentional. If the music still stops suddenly, the problem is usually not that you "forgot a fade." More often, the fade starts in the wrong place, uses the wrong method, conflicts with dialogue, or gets changed after nesting, replacing, or exporting the sequence. For intro and outro beds without paid licenses, review podcast-safe free background music sources.
In Premiere, the two cleanest ways to fade music are audio transitions and volume keyframes. Use transitions for quick endings. Use keyframes when the music has to move around dialogue, logos, beat cuts, or client timing.
Why a Premiere music fade-out can still sound abrupt
A fade can sound abrupt even when it is technically present. The ending may still feel wrong if the fade begins after the musical phrase has already peaked, if the last note is cut before it resolves, or if the visual ending and audio ending are telling different stories.
Premiere also gives you multiple fade tools, and they do not behave the same way. Adobe’s guide to audio crossfade transitions explains that Constant Gain, Constant Power, and Exponential Fade each shape audio differently. Constant Gain changes audio at a constant rate, Constant Power creates a smoother perceived transition, and Exponential Fade uses a more gradual logarithmic curve.
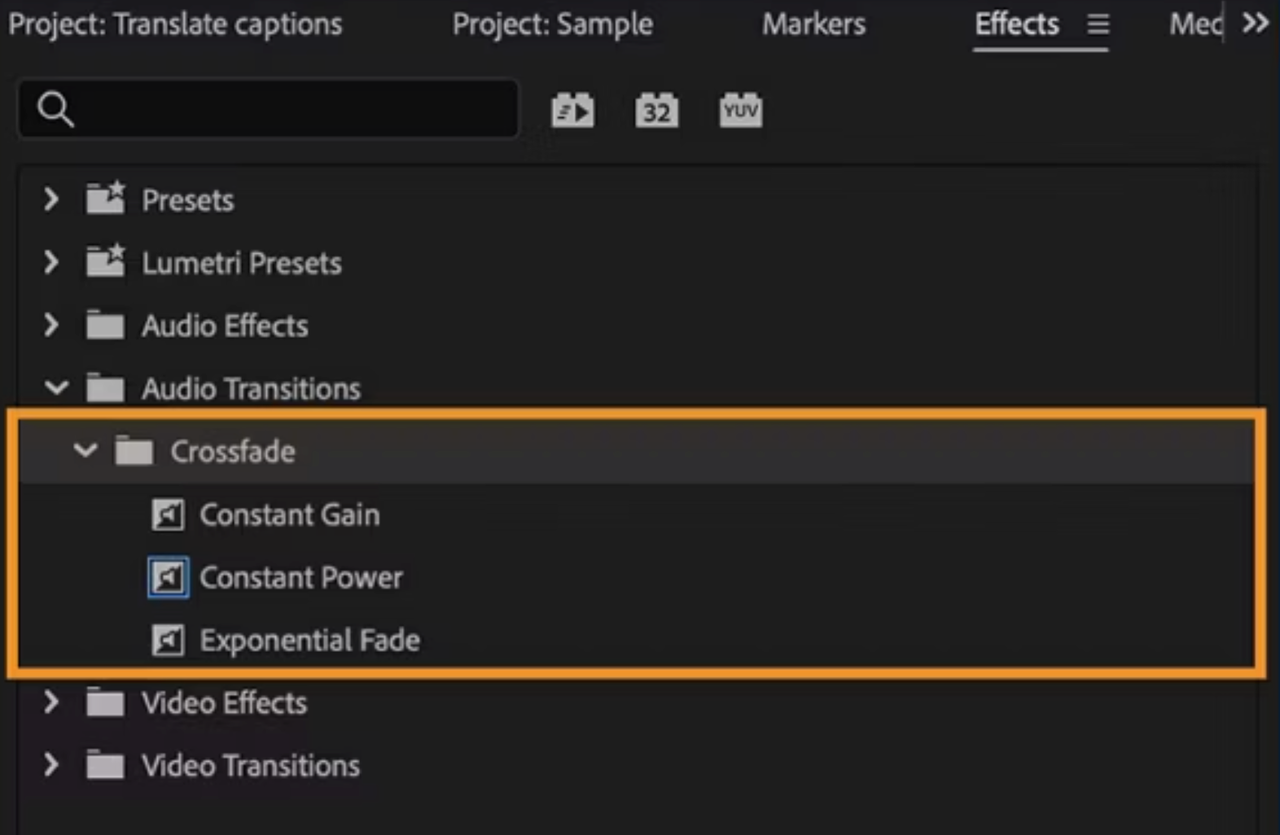
That means a fade can be “correct” in the timeline and still feel too obvious. The fix is to choose the method based on the ending, not just drop the same fade onto every music clip.
Choose an audio transition or volume keyframes
Use an audio transition when you need a fast fade at the end of one music clip. This is the quickest path for simple outros, end cards, social clips, and rough cuts.
Use volume keyframes when the ending needs more shaping. Keyframes are better when the music should dip under a final line of dialogue, hold under an end card, fade in stages, or land on a specific musical beat.
Adobe’s page on specifying default audio transitions says you can edit an audio transition in the Timeline and Effect Controls panel, but it also notes that for customizing the rate of an audio fade or crossfade, you should adjust the clip’s audio volume keyframe graph instead of relying only on a transition.
That is the main decision: transitions are faster; keyframes are more controllable.

Create a quick fade with an audio transition
For a quick Premiere music fade out, expand the audio track in the Timeline panel so you can see the music clip clearly. Then apply an audio transition to the end of the clip, or use the visual fade handles if your current Premiere version shows them. If you are still setting up the soundtrack, start with the broader Premiere Pro music workflow before fine-tuning the ending.
Adobe’s guide to fading in or fading out clip audio says to expand the audio track vertically, then drag the visual fade handles on audio clips to create custom fades.
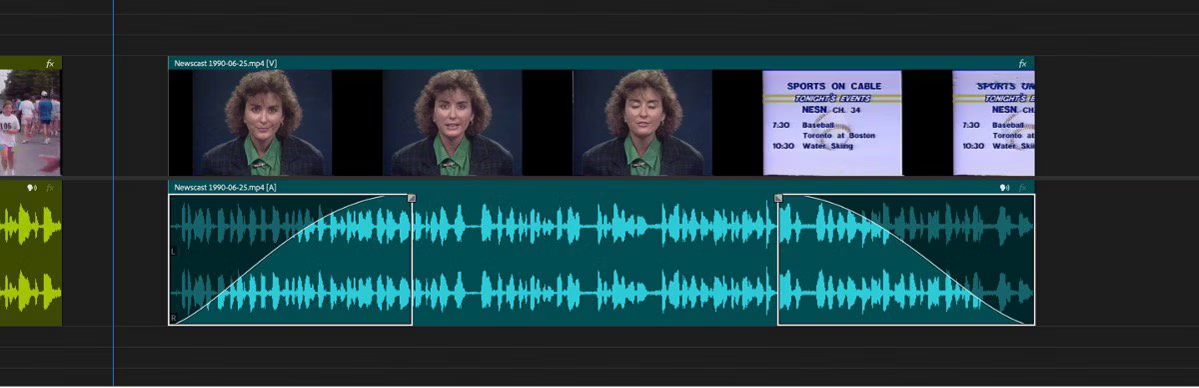
If you are using the Effects panel, look under audio transitions and test the crossfade type that best suits the ending. Constant Power is often a useful starting point because it is commonly used for smooth audio transitions in Premiere. Exponential Fade may feel more gradual in some endings, especially when you want the music to leave gently instead of simply dropping away.
After applying the transition, play the ending from several seconds before the fade begins. Do not judge it by looping only the last frame or the last beat. The viewer hears the fade as part of the final moment, not as an isolated effect.
Shape a custom fade with keyframes
Use keyframes when the fade needs a specific shape. For example, you may want the music to stay present under a logo, drop quickly before a final spoken line, then fade more slowly after the line ends.
Adobe’s keyframes overview explains that keyframes mark values at specific points in time, and Premiere interpolates the change between them. For audio, that value can be volume.
To build a custom fade, show the music clip’s volume line in the Timeline or use the Effect Controls panel. Add a keyframe where the fade should begin, then add another keyframe near the end where the music should reach silence or the intended final level. Add extra keyframes if the fade needs to pause, dip, or curve around dialogue.
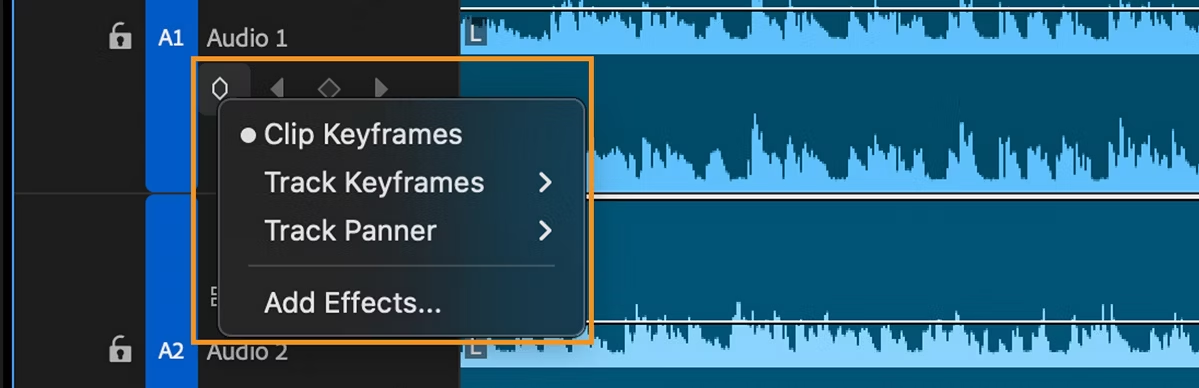
Adobe’s guide to adjusting track volume with keyframes distinguishes between clip keyframes, which apply to a selected clip, and track keyframes, which apply to the whole track. For a single music cue, clip keyframes are usually easier to hand off. For a full music bus or a track-based mix, track keyframes may make more sense.
Choose the fade starting point by ending type
There is no universal fade length that works for every video. A clean fade depends on what happens at the end of the sequence.
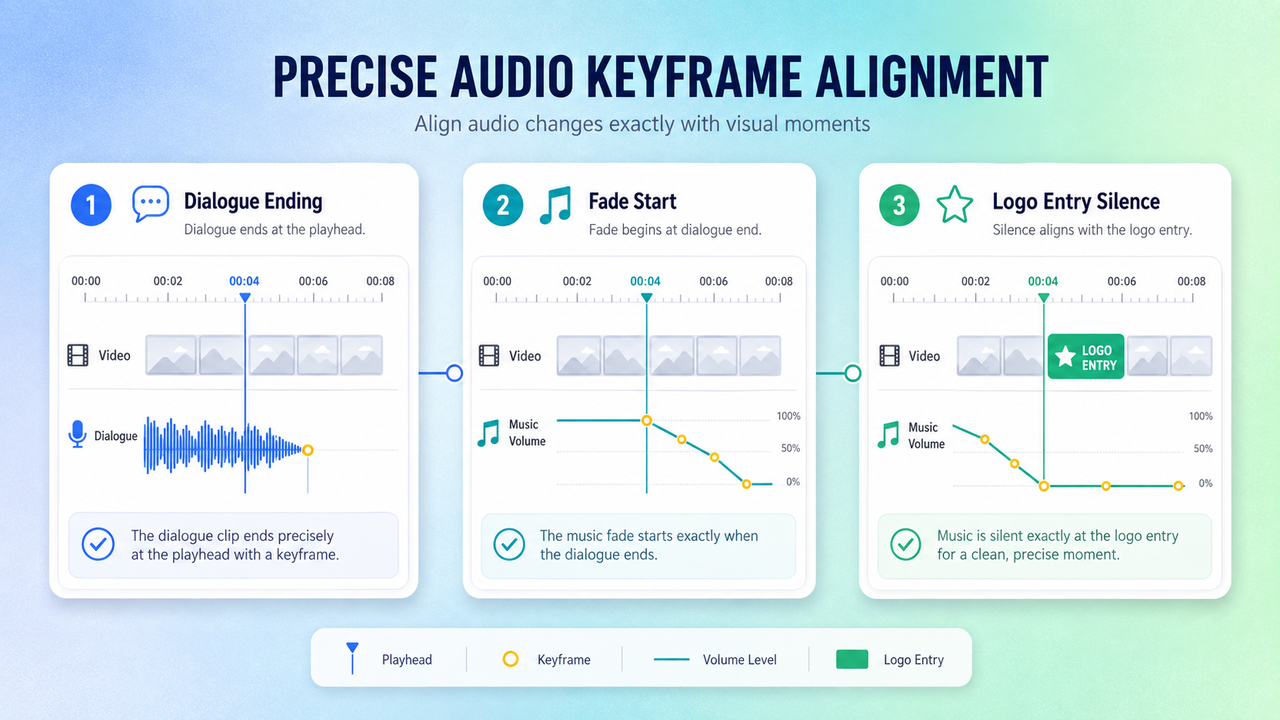
Dialogue ending
If the video ends with a spoken line, the fade should protect the words first. Start reducing the music before the final phrase if the music competes with speech. Let the last words finish clearly, then decide whether the music should continue briefly or disappear with the cut.
Avoid fading so late that the viewer notices the music only when it suddenly drops under the final word.
End card or logo
If the video ends on an end card, logo, or call-to-action screen, the music can often carry the viewer through that final visual. Let the fade start before the card feels static, then land before or exactly with the final frame.
If the end card has voiceover, button sounds, or legal text that must be understood, treat it more like a dialogue ending.
Cut on a musical beat
If the video cuts out on a beat, the fade may need to begin earlier than expected. A tiny fade at the very end may only soften the waveform, not the musical idea.
Listen for a phrase ending, downbeat, cymbal tail, or natural pause. Trim around that moment, then use the fade to polish the exit. The goal is for the ending to feel intentional, not like the music file ran out.
Fix fades that feel too short or too obvious
If the fade feels too short, start it earlier or choose a curve that leaves more musical tail. If it feels too obvious, the fade may be pulling attention to itself. Try fading under a visual change, a logo move, a natural pause, or a less dense part of the track.
If the fade creates a dip before another audio clip, check whether you are fading one clip out while another clip fades in. Adobe’s guide to crossfading between audio clips says adjacent audio clips should be on the same track and trimmed before applying a crossfade. If the clips are not adjacent or the edit has no usable handle, the transition may not behave the way you expect.
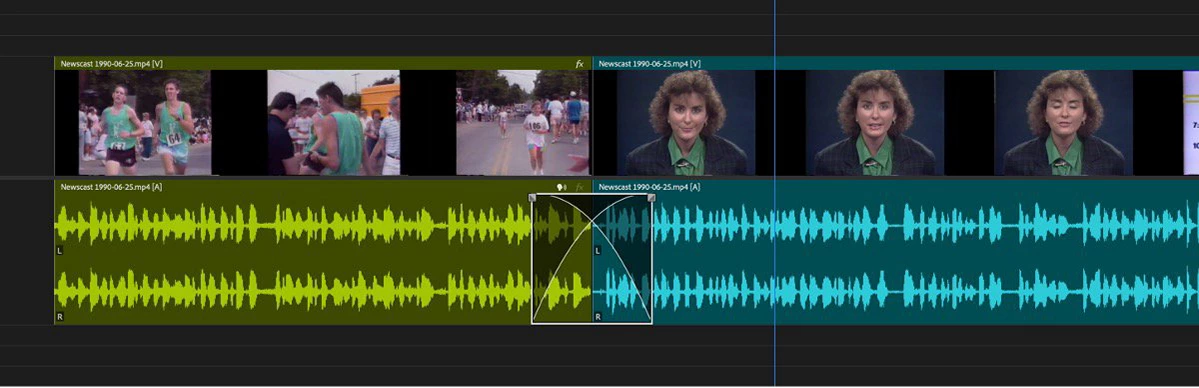
If the fade looks fine but sounds uneven, turn on waveform feedback. Adobe’s Dynamic Audio Waveforms documentation says dynamic waveforms visually reflect volume adjustments from clip keyframes, Essential Sound, volume controls, audio gain, and related changes. That can help you spot a sudden level jump before you export.
Review the fade outside the editing timeline
After the fade works in the timeline, export a draft and listen to the actual file. Timeline playback may not always represent the final exported result, especially when preview performance is limited.
Adobe’s export guide says to select the timeline or source clip, choose File > Export > Media, then set the format, preset, output name, and location before exporting. It also notes that the Audio section lets you confirm channel layout, sample rate, and bit rate for delivery requirements.

Review the exported file from several seconds before the fade through the final frame. Check it on headphones and on normal speakers. If the ending feels smooth in the exported file, the fade is ready to hand off.
FAQ
Why can a fade change after a sequence is nested?
A nested sequence can change how you see and adjust the ending because you are now working with a sequence clip inside another sequence. Adobe’s guide to nesting sequences says you can double-click a nested sequence clip to open and edit its source sequence. If a fade sounds different after nesting, check whether the fade lives inside the source sequence, on the nested clip, or on the parent sequence track.
How should fade settings be documented for handoff?
Note where the music fade begins, where it ends, whether it uses a transition or keyframes, and whether it belongs to the clip, track, nested sequence, or parent sequence. Also include the music file name and sequence version so another editor can find the exact fade quickly.
What happens when the source track is replaced later?
A replacement track may have a different intro, tail, waveform, tempo, or final chord. Even if it has the same duration, the old fade may no longer feel natural. After replacing the source music, recheck the ending against the final frame and rebuild the fade if needed.
Should editors retain an unfaded music master?
Yes. Keep an unfaded copy of the music master or source file before applying timeline fades. That gives the team a clean reference if the ending changes, the sequence is extended, the client requests a different fade, or the soundtrack needs to be rebuilt for another version.