Guides
How to Add Sound Effects to DaVinci Resolve
- Written by
- Sonilo Team
- Published
Sound effects stay manageable in DaVinci Resolve when the timeline separates three decisions: source, timing, and mix role. Importing a clip is the easy part. The real work is choosing its track, aligning its transient with the picture, and keeping it from masking the soundtrack. Short vertical formats raise the bar on fit: an Instagram Reels music sync steps workflow should lock duration, energy, and rights to the exact cut before upload.
This guide explains how to add sound effects to DaVinci Resolve through the Fairlight workflow used in Resolve 20 and 21. Blackmagic currently lists DaVinci Resolve 21 as active. Its detailed Fairlight Audio Guide is still labeled for Resolve 20. Core controls remain recognizable, but names or positions may vary slightly between releases and workspace layouts.
Before You Start in Fairlight
Lock the picture as far as practical before detailed sound work. A late trim can move every precisely placed footstep, impact, and interface click. If the edit is changing, reserve fine alignment for the approved cut.
Next, gather the audio files and confirm their source. Keep each original download, generation record, license or attribution note, and the date you obtained it. “Royalty-free” does not automatically mean unrestricted use, and a file found online may not include permission for client or commercial work. This is general workflow information, not legal advice; check the current terms of the source and the destination platform.
Open Fairlight and confirm that the timeline frame rate matches the approved video. Listen once with dialogue, production sound, and music in place. This reveals where effects are missing and where the recording already carries the action.
Create a spotting list before importing files. Record the timecode, action, desired sound, and priority. Blackmagic’s Resolve 20 Fairlight training uses timeline markers and a marker index as a roadmap for adding effects. The notes remain visible when another editor opens the timeline.
Build and Label Dedicated Sound Effect Tracks
Do not place every effect on one general audio track. Add and label dedicated DaVinci Resolve audio tracks before the timeline becomes crowded. A small project might use this structure:
- SFX Hard for impacts, doors, clicks, and other defined events
- Foley for footsteps, cloth, and object handling
- Ambience for room tone, traffic, wind, or crowds
- SFX Design for stylized rises, transitions, and processed effects
Choose mono or stereo according to the source and intended placement. A localized click may suit mono, while a wide ambience will usually need stereo. Listen before changing the channel format.
Dedicated tracks let you mute, solo, route, or export one sound family without searching clip by clip. They also reduce accidental processing across unrelated effects.
Add Effects From the Sound Library or Media Pool
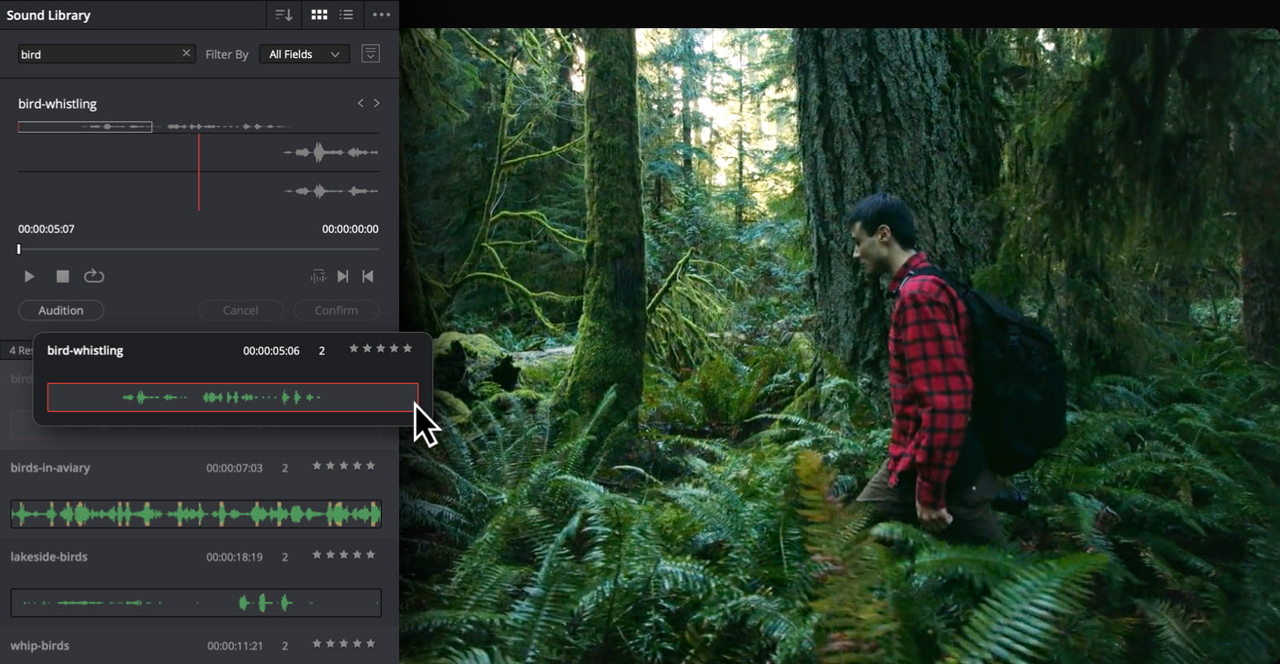
Resolve offers two entry points. Use the DaVinci Resolve Sound Library for a searchable collection available across projects. Blackmagic’s current Fairlight overview documents external-library access and timeline auditioning. It also describes synchronizing a waveform point with the playhead.
Use the Media Pool for project-specific or approved files. Place them in a named bin, then drag each clip to its assigned Fairlight track. This route suits a fixed client package or limited source set.
Neither location grants usage rights. The library is an organizational route, not a license. If an external service produces a custom synchronized effect, export the audio first and import it into Resolve as a normal media file. For example, Sonilo currently offers video-to-SFX and text-to-SFX outputs as separate files. It is an upstream source, not a Resolve panel or built-in Fairlight feature. Review Sonilo’s current licensing page and plan conditions before commercial use; its Free and Creator plans are currently described as personal and non-commercial.
Spot and Sync Effects to Picture
Place the playhead on the action, then decide which part of the sound should meet it. The file start is not always the sync point. A door may contain a quiet approach before the latch clicks.
Use Markers and Waveforms
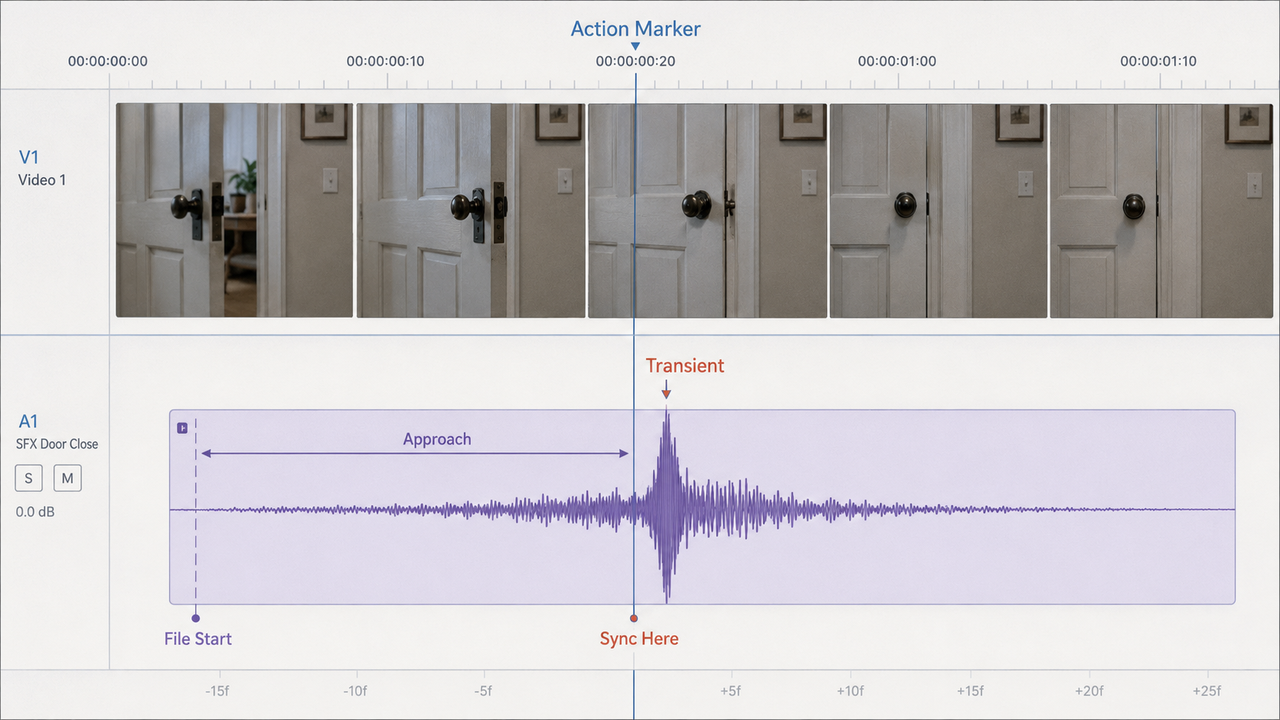
Add timeline markers at important actions, not every frame. Name them by function, such as “cup down” or “logo reveal.” The marker describes the cue; the clip name identifies its source.
Expand the track and align the important transient with the marker, then replay at normal speed. Blackmagic documents Fairlight audio and video scrollers for comparing frames with waveforms. They help with hand contacts, cuts, and mechanical actions.
Nudge Effects at Frame Level
Zoom in before making small timing adjustments. Move the clip by a frame, replay the surrounding second, and judge the result from motion rather than waveform appearance alone. A transient placed exactly on the visible contact may still feel late because perception and sound propagation differ by scene.
Use snapping deliberately. It helps clips land on markers, but can block a small offset when sound should lead or trail the frame. Preserve the clip handles until timing is approved.
Trim, Fade, and Level Each Effect
Trim unused head and tail material without cutting into the sound’s natural decay. If an ambience or mechanical effect ends abruptly, extend the available tail or add a short fade. Blackmagic’s current Fairlight page documents clip-side fade handles, a clip gain line, and level keyframes. Use the smallest adjustment that removes the edit without making the sound collapse unnaturally.
Set clip gain before track automation. Clip gain solves differences between files; the track fader controls the whole sound family. One loud impact should not force every hard effect lower.
Do not normalize every effect to the same peak. A keyboard click, coat movement, and car door should not occupy the same apparent level. Start with story importance, distance, camera perspective, and the surrounding production sound.
Balance Effects With Dialogue, Ambience, and Music
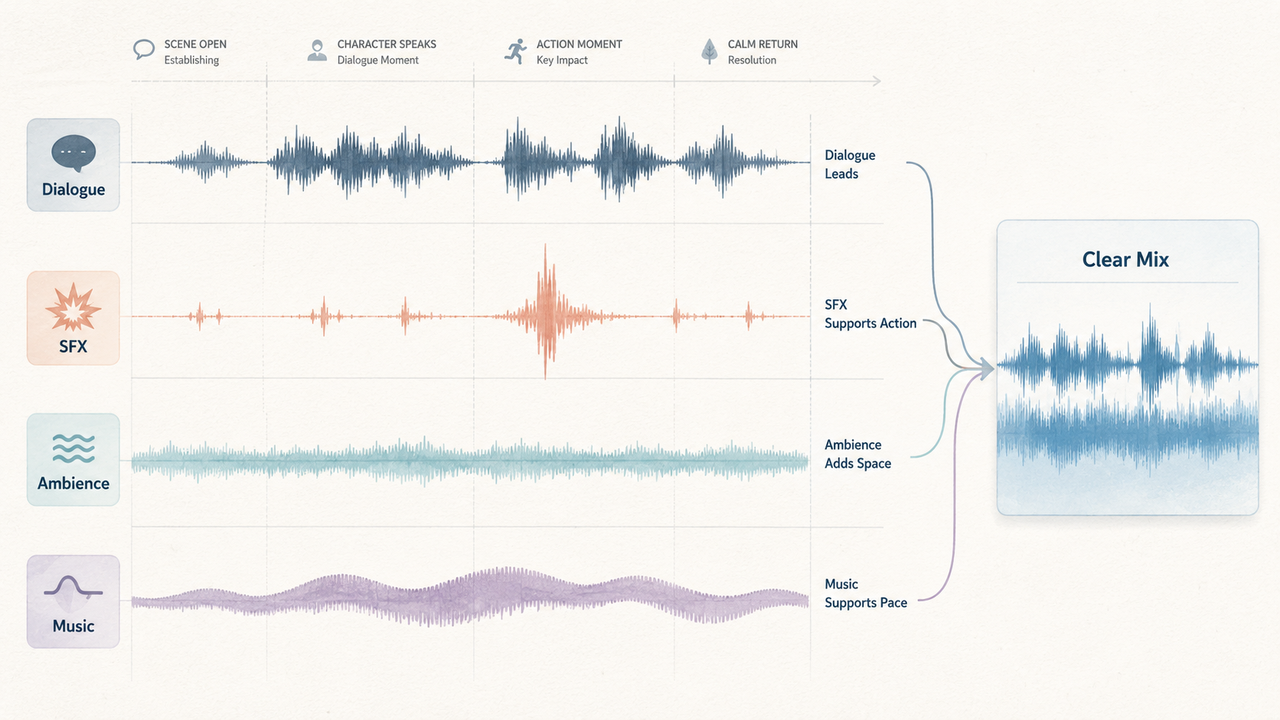
Mix from the most important element outward. In a tutorial or interview, dialogue usually leads. In a silent action sequence, Foley or a designed impact may briefly take that role. Lower or simplify competing layers before boosting the new effect.
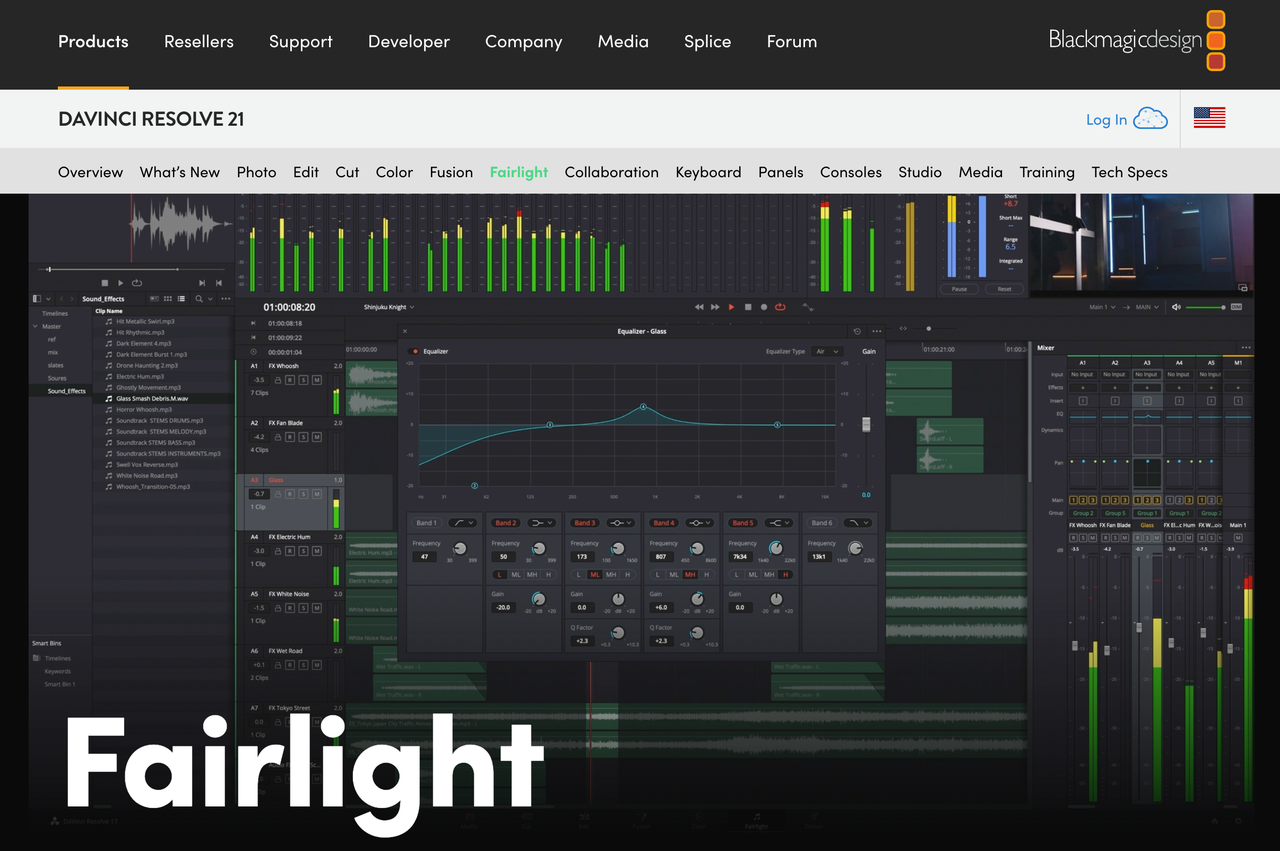
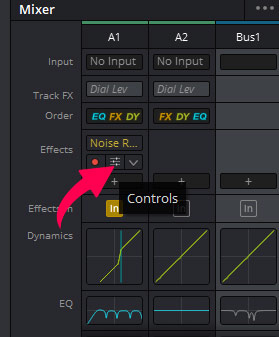
Use the Fairlight Mixer to compare tracks and busses. Blackmagic documents channel faders, panning, EQ, dynamics, and effects slots. Solo helps diagnosis, but make final decisions with the full soundtrack playing.
Check the approach, event, and recovery around each major effect. An impact may mask the next word; an ambience may crowd music. Adjust only what conflicts.
Fix Common Sound Effect Sync Problems
If an effect sounds late, confirm that you aligned its meaningful transient rather than its file start. If it drifts, check whether the frame rate or source interpretation changed.
If a clip moves during later editing, return to the spotting marker and recheck the surrounding shot. Track locks can protect approved audio during picture changes, but they do not replace a post-recut review.
If playback stutters, bypass heavy processing and test again. The apparent sync error may be monitoring latency rather than clip placement. Finally, export a review file and watch it outside Resolve. Confirm sync on normal playback hardware before approving the mix.
FAQ
How do I relink missing effects after moving a project?
Keep the source folders intact. Select offline clips in the Media Pool, then use Resolve’s relink or source-folder controls to identify the new location. For a transfer, create a project archive or copy the project and used media together. Verify several effects after relinking instead of assuming matching filenames guarantee the correct source.
Can teams share a Resolve sound library across computers?
Teams can store approved effects in a managed shared location, but each workstation should confirm that Resolve can access and index that location. Use consistent folder names and permissions. Do not assume one editor’s local Sound Library index or drive path will automatically appear on another computer.
Can a sound effect track be exported separately for client review?
Yes. Route the relevant tracks to a dedicated bus or choose the required tracks or busses in the Deliver page’s audio settings. Blackmagic’s current Fairlight documentation supports audio-only output and selection of busses and tracks. Label the file as a review stem so it is not mistaken for the final full mix.
What should editors archive before replacing a final effect?
Keep the approved export, original source, edited version, timeline location, source URL, applicable license record, and approval note. Retain the prior effect on a disabled track or alternate timeline when practical. That record makes a rollback possible without reconstructing the decision.
When should the mix move to a dedicated audio session?
Consider a dedicated handoff for extensive dialogue repair, detailed Foley, many stems, strict loudness specifications, immersive formats, or a specialist mix. A labeled Resolve timeline, spotting markers, source files, handles, and a reference video will make that handoff substantially cleaner.